會(huì)用到的庫(kù)的
1、selenium的webdriver
2、tesserocr或者pytesseract進(jìn)行圖像識(shí)別
3、pillow的image進(jìn)行圖片處理
|
1
2
3
|
from selenium import webdriverimport tesserocrfrom pil import image |
獲取驗(yàn)證碼圖片方法1:
|
1
2
3
4
5
6
7
8
9
10
11
|
def get_code_image(file_name): driver.save_screenshot(file_name) # 截取整個(gè)屏幕并保存 code_element = driver.find_element_by_class_name("verify_code_img___1mei_") # 定位到驗(yàn)證碼元素 left = code_element.location['x'] # 定位到截圖位置 top = code_element.location['y'] right = code_element.size['width'] + left bottom = code_element.size['height'] + top im = image.open(file_name) # 從文件讀取截圖,截取驗(yàn)證碼位置再次保存 img = im.crop((left, top, right, bottom)) img.save(file_name) return file_name |
獲取驗(yàn)證碼圖片方法2:
|
1
2
3
|
def get_code_image(file_name): code_element = driver.find_element_by_class_name("verify_code_img___1mei_") # 定位到驗(yàn)證碼元素 code_element.screenshot(file_name) |
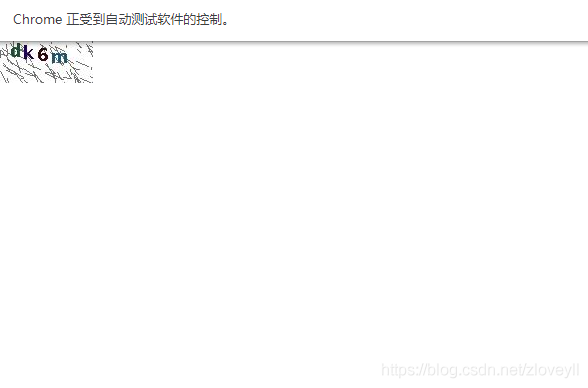
注:此方法截圖時(shí)屏幕會(huì)閃動(dòng),可能引發(fā)bug,如下圖,目前沒(méi)有解決

處理驗(yàn)證碼圖片
|
1
2
3
4
5
6
7
8
9
10
11
12
13
14
15
16
17
18
19
20
21
22
23
24
25
|
def deal_code_image(file_name): image = image.open(file_name) # image.show() #查看處理前的圖片 # 處理圖片去除干擾 # 將圖片轉(zhuǎn)化為灰度圖像 image = image.convert('l') threshold = 90 # 設(shè)置臨界值,臨界值可調(diào)試 table = [] for i in range(256): if i < threshold: table.append(0) else: table.append(1) image = image.point(table, '1') # image.show() #查看處理后的圖片 # 1:使用tesseract庫(kù)識(shí)別圖片中的驗(yàn)證碼 # res = tesserocr.image_to_text(image) # 2:使用pytesseract庫(kù)識(shí)別圖片中的驗(yàn)證碼 res = pytesseract.image_to_string(image) # print(res) #查看識(shí)別出來(lái)的文案 res = res.replace(" ", "") #去除結(jié)果中的空格 return res |
處理前的圖片,有干擾,無(wú)法識(shí)別

處理后的圖片,基本可以識(shí)別

識(shí)別結(jié)果不一定準(zhǔn)確,如果驗(yàn)證碼輸入錯(cuò)誤,可以點(diǎn)擊換一張圖片再次識(shí)別,多次嘗試,本次不做說(shuō)明
到此這篇關(guān)于python3定位并識(shí)別圖片驗(yàn)證碼實(shí)現(xiàn)自動(dòng)登錄的文章就介紹到這了,更多相關(guān)python識(shí)別圖片驗(yàn)證碼實(shí)現(xiàn)自動(dòng)登錄內(nèi)容請(qǐng)搜索服務(wù)器之家以前的文章或繼續(xù)瀏覽下面的相關(guān)文章希望大家以后多多支持服務(wù)器之家!
原文鏈接:https://blog.csdn.net/zloveyll/article/details/113246855


