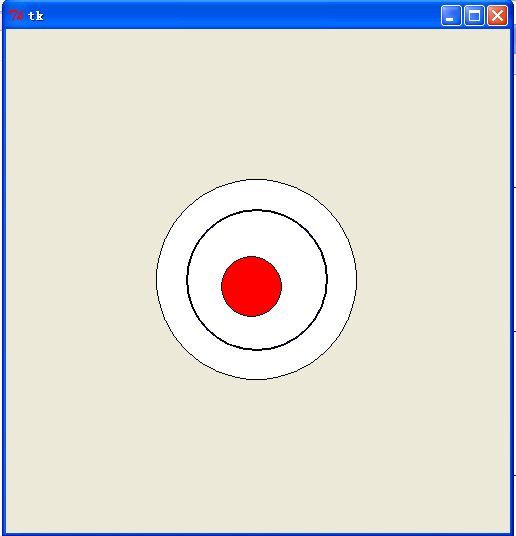
本文實例講述了python開發之tkinter實現圖形隨鼠標移動的方法。分享給大家供大家參考,具體如下:
做這個東西的時候,靈感源自于一個js效果:
兩個眼睛隨鼠標移動而移動
運行效果:

代碼部分:
|
1
2
3
4
5
6
7
8
9
10
11
12
13
14
15
16
17
18
19
20
21
22
23
24
25
26
27
28
29
30
31
32
33
34
35
36
37
38
39
40
41
42
43
44
45
46
47
48
49
50
51
52
53
54
55
56
57
58
59
60
61
62
63
64
65
66
67
68
69
70
71
72
73
74
75
76
77
78
79
80
81
82
83
84
85
86
87
88
89
90
91
92
93
94
95
96
97
98
99
100
101
102
103
104
105
106
107
108
109
110
111
112
113
114
115
116
117
118
119
120
121
122
123
124
125
126
127
128
129
130
131
132
133
134
135
136
137
138
|
from tkinter import *#1.獲取到小圓當前的圓心坐標(x1, y1)#2.獲取到小圓移動的圓心坐標(x2, y2)#3.把小圓從坐標(x1, y1)移動到坐標(x2, y2)__author__ = {'name' : 'Hongten', 'mail' : 'hongtenzone@foxmail.com', 'blog' : 'http://blog.csdn.net/', 'QQ': '648719819', 'created' : '2013-09-20'}class Eay(Frame): def createWidgets(self): ## The playing field self.draw = Canvas(self, width=500, height=500) #鼠標位置 self.mouse_x = 450 self.mouse_y = 250 #圓心坐標(x,y) self.oval_zero_x = 250 self.oval_zero_y = 250 #外面大圓半徑 self.oval_r = 100 #里面小圓半徑 self.oval_R = 30 self.oval_r1 = self.oval_r - self.oval_R + 0.5 self.oval_r2 = self.oval_r - self.oval_R - 0.5 #小圓 self.letter_ball_x1 = 250 self.letter_ball_y1 = 250 # The ball 外面大圓 self.ball = self.draw.create_oval((self.oval_zero_x - self.oval_r), (self.oval_zero_y - self.oval_r), (self.oval_zero_x + self.oval_r), (self.oval_zero_y + self.oval_r), fill="white") self.ball = self.draw.create_oval((self.oval_zero_x - self.oval_r1), (self.oval_zero_y - self.oval_r1), (self.oval_zero_x + self.oval_r1), (self.oval_zero_y + self.oval_r1), fill="blue") self.ball = self.draw.create_oval((self.oval_zero_x - self.oval_r2), (self.oval_zero_y - self.oval_r2), (self.oval_zero_x + self.oval_r2), (self.oval_zero_y + self.oval_r2), fill="white") #里面小圓 self.ball_over = self.draw.create_oval((self.oval_zero_x - self.oval_R), (self.oval_zero_y - self.oval_R), (self.oval_zero_x + self.oval_R), (self.oval_zero_y + self.oval_R), fill="red") self.draw.pack(side=LEFT) def mouseMove(self, event): self.mouse_x = event.x self.mouse_y = event.y if SHOW_LOG: print('#' * 50) print('鼠標的坐標為:({}, {})'.format(self.mouse_x, self.mouse_y)) print('小圓當前坐標為:({}, {})'.format(self.letter_ball_x1, self.letter_ball_y1)) '''獲取到小圓移動的圓心坐標(x2, y2)''' ax_x = abs(self.mouse_x - self.oval_zero_x) ax_y = abs(self.mouse_y - self.oval_zero_y) if SHOW_LOG: print('坐標A(oval_zero_x, oval_zero_y)到坐標X(mouse_x, mouse_y)的距離為AX') print('AX中ax_x = {}, ax_y = {}'.format(ax_x, ax_y)) ax_len = ((ax_x ** 2) + (ax_y ** 2))**0.5 if SHOW_LOG: print('AX的長度為:{}'.format(ax_len)) #如果鼠標坐標在(ax_len > |r-R|) if ax_len > abs(self.oval_r - self.oval_R): ac_len = abs(self.oval_r - self.oval_R) if SHOW_LOG: print('AC的產度為:{}'.format(ac_len)) if int(self.mouse_x - self.oval_zero_x) != 0: if int(self.mouse_y - self.oval_zero_y) != 0: #求直線斜率 y = kx + b k = (self.mouse_y - self.oval_zero_y)/(self.mouse_x - self.oval_zero_x) if SHOW_LOG: print('鼠標到大圓圓心的直線的斜率為:{}'.format(k)) b = self.mouse_y - (k * self.mouse_x) ################################################### #小圓移動后的坐標 #這里有三個條件: # 1.小圓的圓心坐標(x1, y1)在直線AC上(y = kx + b) # 2.(r-R)^2 = x1^2 + y1^2 由1,2可以得到 => (r-R)^2 = x1^2 + 2*x1*k*b + b^2 => x1有兩個值,通過3判斷x1的符號,從而求出y1 # 3.if self.mousex_x > 0: # x1 > 0 #這是一個二元二次方程,方程的解有兩組,不過通過鼠標的位置self.mouse_x(self.mouse_y)可以判斷圓心坐標x1(y1) letter_ball_x2 = ((ac_len * (abs(self.mouse_x - self.oval_zero_x)))/ax_len) + self.letter_ball_x1 letter_ball_y2 = (letter_ball_x2 * k) + b if SHOW_LOG: print('小圓當前坐標為:({}, {})'.format(self.letter_ball_x1, self.letter_ball_y1)) print('小圓移動后坐標為:({}, {})'.format(letter_ball_x2, letter_ball_y2)) #把小圓從坐標(x1, y1)移動到坐標(x2, y2) self.moved_x2 = letter_ball_x2 - self.letter_ball_x1 self.moved_y2 = letter_ball_y2 - self.letter_ball_y1 if SHOW_LOG: print('需要移動的距離是:({}, {})'.format(int(self.moved_x2), int(self.moved_y2))) self.draw.move(self.ball_over, int(self.moved_x2), int(self.moved_y2)) self.letter_ball_x1 = letter_ball_x2 self.letter_ball_y1 = letter_ball_y2 else: print('鼠標在X軸上') else: print('鼠標在Y軸上') else: if SHOW_LOG: print('小圓的移動后的坐標就是鼠標坐標') #小圓移動后的坐標 letter_ball_x2 = self.mouse_x letter_ball_y2 = self.mouse_y if SHOW_LOG: print('小圓移動后坐標為:({}, {})'.format(letter_ball_x2, letter_ball_y2)) #把小圓從坐標(x1, y1)移動到坐標(x2, y2) self.moved_x2 = letter_ball_x2 - self.letter_ball_x1 self.moved_y2 = letter_ball_y2 - self.letter_ball_y1 if SHOW_LOG: print('需要移動的距離是:({}, {})'.format(int(self.moved_x2), int(self.moved_y2))) self.draw.move(self.ball_over, int(self.moved_x2), int(self.moved_y2)) self.letter_ball_x1 = letter_ball_x2 self.letter_ball_y1 = letter_ball_y2 def move_ball(self, *args): #當鼠標在窗口中按下左鍵拖動的時候執行 #Widget.bind(self.draw, "<B1-Motion>", self.mouseMove) #當鼠標在大圓內移動的時候執行 self.draw.tag_bind(self.ball, "<Any-Enter>", self.mouseMove) def __init__(self, master=None): global letter_ball_x2 letter_ball_x2 = 0 global letter_ball_y2 letter_ball_y2 = 0 global SHOW_LOG SHOW_LOG = True Frame.__init__(self, master) Pack.config(self) self.createWidgets() self.after(10, self.move_ball)game = Eay()game.mainloop() |
希望本文所述對大家Python程序設計有所幫助。


