CocosCreator版本2.3.4
一、HttpGET
Get方式,客戶端請求本機地址3000端口,并攜帶參數url和name,服務端收到后返回name參數。
cocos客戶端:
|
1
2
3
4
5
6
7
8
9
10
11
12
13
14
15
16
17
18
19
|
//訪問地址let url = "http://127.0.0.1:3000/?url=123&name=321";//新建Httplet xhr = new XMLHttpRequest();//接收數據xhr.onreadystatechange = function () { if (xhr.readyState == 4 && (xhr.status >= 200 && xhr.status < 400)) { var response = xhr.responseText; console.log(response); }};//錯誤處理xhr.onerror = function(evt){ console.log(evt);}//初始化一個請求,GET方式,true異步請求xhr.open("GET", url, true);//發送請求xhr.send(); |
為了方便測試,在本機用nodejs搭建一個簡易服務器,在收到訪問后,返回請求參數中的name值。
nodejs服務端:
|
1
2
3
4
5
6
7
8
9
10
11
12
13
14
15
16
17
|
var app = require('express')(); var http = require('http').Server(app); app.get('/', function(req, res){ //設置允許跨域的域名,*代表允許任意域名跨域 res.header("Access-Control-Allow-Origin","*"); //允許的header類型 res.header("Access-Control-Allow-Headers","content-type"); //跨域允許的請求方式 res.header("Access-Control-Allow-Methods","DELETE,PUT,POST,GET,OPTIONS"); res.send(req.query.name); }); http.listen(3000, function(){ console.log('listening on *:3000'); }); |
運行nodejs的服務器,并運行cocos代碼,cocos中
|
1
|
console.log(response); //輸出為321 |
二、HTTPPOST
客戶端請求服務器,攜帶參數name,服務端收到后返回name。
cocos客戶端:
|
1
2
3
4
5
6
7
8
9
10
11
12
13
14
15
|
let url = "http://127.0.0.1:3000/";let xhr = new XMLHttpRequest(); xhr.onreadystatechange = function () { if (xhr.readyState == 4 && (xhr.status >= 200 && xhr.status < 400)) { var response = xhr.responseText; console.log(response); }};xhr.onerror = function(evt){ console.log(evt);}xhr.open("POST", url, true);xhr.setRequestHeader("Content-Type", "application/x-www-form-urlencoded");xhr.send("name=123"); |
nodejs服務端:
|
1
2
3
4
5
6
7
8
9
10
11
12
13
14
15
16
17
18
19
20
21
22
23
24
25
26
27
28
29
30
|
var app = require('express')(); var http = require('http').Server(app); var querystring = require('querystring'); app.post('/', function(req, res){ //設置允許跨域的域名,*代表允許任意域名跨域 res.header("Access-Control-Allow-Origin","*"); //允許的header類型 res.header("Access-Control-Allow-Headers","content-type"); //跨域允許的請求方式 res.header("Access-Control-Allow-Methods","DELETE,PUT,POST,GET,OPTIONS"); var body = ""; req.on('data', function (chunk) { body += chunk; //一定要使用+=,如果body=chunk,因為請求favicon.ico,body會等于{} console.log("chunk:",chunk); }); req.on('end', function () { body = querystring.parse(body); console.log("body:",body); res.send(body.name); });}); http.listen(3000, function(){ console.log('listening on *:3000'); }); |
cocos輸出
|
1
|
console.log(response); //輸出123 |
三、WebSocket
cocos客戶端代碼:
連接本地服務器127.0.0.1:8001,連接成功后發送一段字符串,并將接收的字符串打印
|
1
2
3
4
5
6
7
8
9
10
11
12
13
14
15
16
17
18
19
20
21
22
23
|
let ws = new WebSocket("ws://127.0.0.1:8001");ws.onopen = function (event) { console.log("Send Text WS was opened.");};ws.onmessage = function (event) { console.log("response text msg: " + event.data);};ws.onerror = function (event) { console.log("Send Text fired an error");};ws.onclose = function (event) { console.log("WebSocket instance closed.");}; setTimeout(function () { if (ws.readyState === WebSocket.OPEN) { console.log("WebSocket start send message."); ws.send("Hello WebSocket, I'm a text message."); } else { console.log("WebSocket instance wasn't ready..."); }}, 3000); |
nodejs服務端:
接收字符串成功后,打印接收的數據,并返回一段字符串。
|
1
2
3
4
5
6
7
8
9
10
11
12
13
14
15
16
17
18
|
var ws = require("nodejs-websocket"); console.log("開始創建websocket");var server = ws.createServer(function(conn){ console.log("連接成功"); conn.on("text", function (obj) { console.log("接收:",obj); conn.send("message come from server"); }) conn.on("close", function (code, reason) { console.log("關閉連接") }); conn.on("error", function (code, reason) { console.log("異常關閉") });}).listen(8001)console.log("開始創建websocket完畢"); |
測試結果,客戶端瀏覽器輸出:

nodejs端輸出:

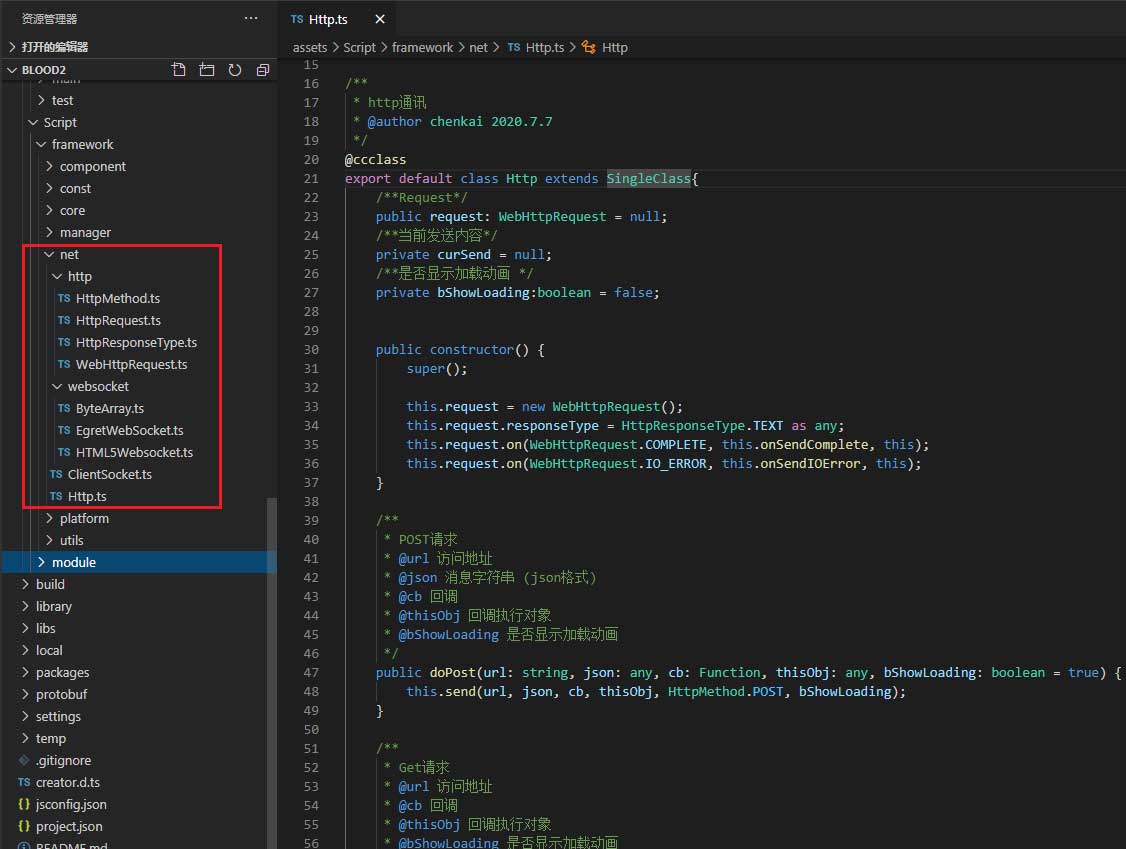
四、移植Egret的http和websocket到cocos
因為cocos沒有封裝工具類,所以直接從Egret移植http和websocket到cocos中使用,還算方便。

以上就是Cocos Creator 的Http和WebSocke的詳細內容,更多關于Cocos Creator的資料請關注服務器之家其它相關文章!
原文鏈接:https://www.cnblogs.com/gamedaybyday/p/13028559.html


