使用python做個自定義動態(tài)壁紙
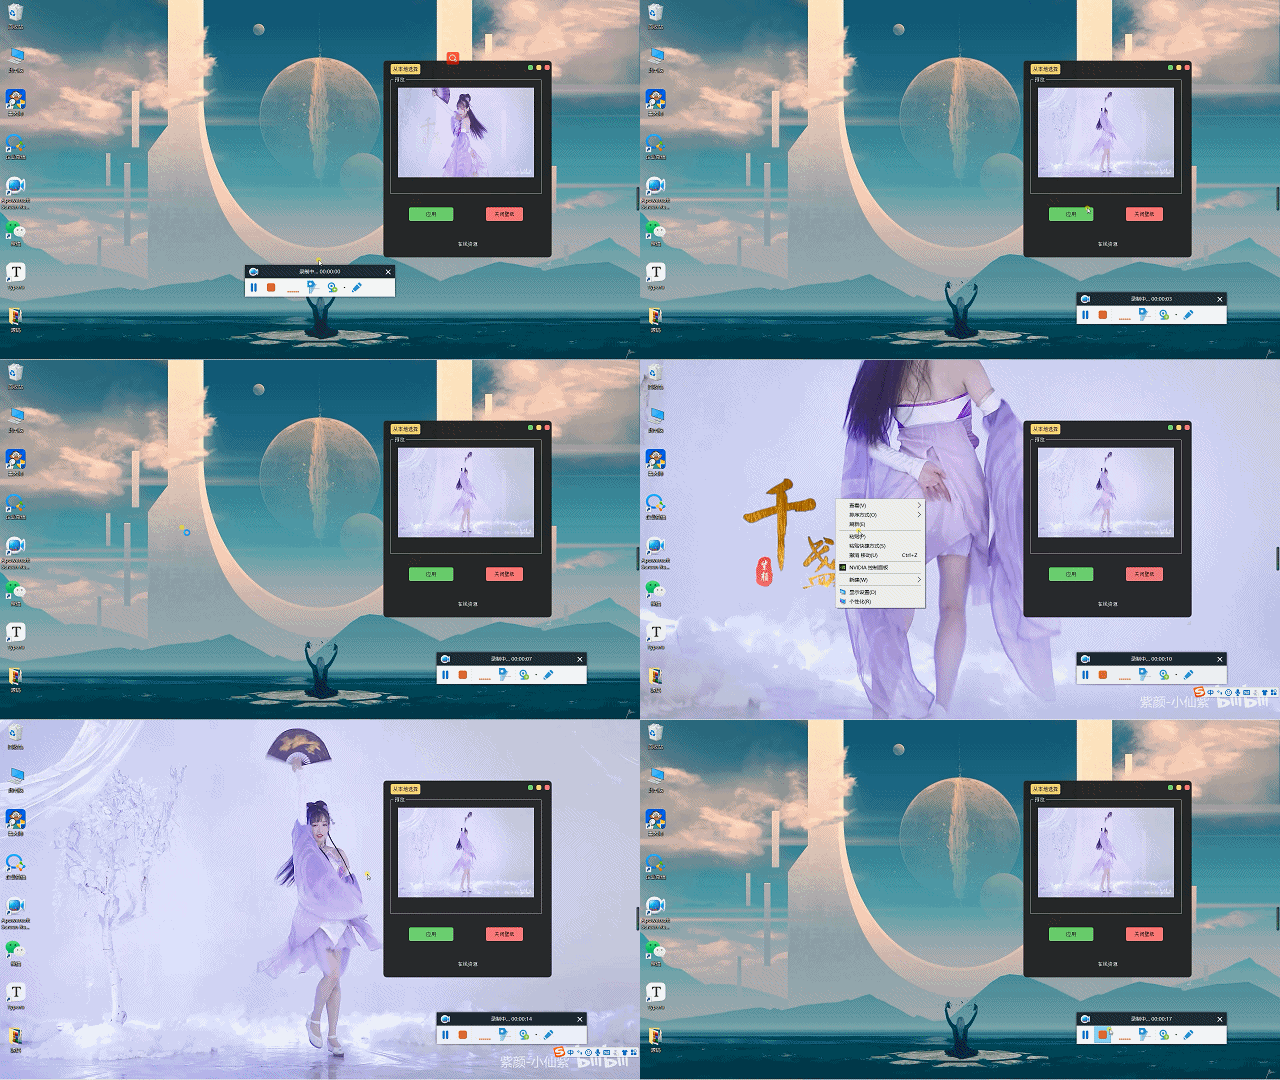
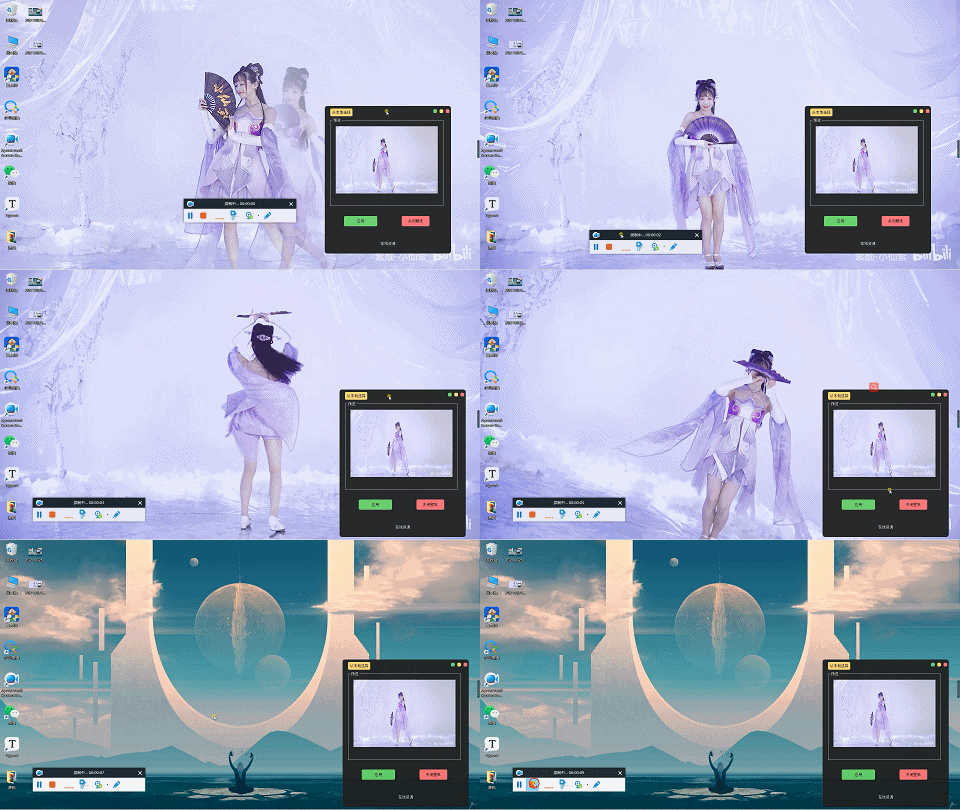
首先一起來看看最終實現的自定義動態(tài)壁紙效果:
 接我
接我
接下來,我們開始介紹這個自定義動態(tài)桌面的制作過程。
一、核心功能設計
總體來說,我們需要實現將自己喜歡的視頻轉成一個動態(tài)桌面,知識點主要包含了對視頻提取解析,視頻輪播,pyqt5窗體設置,桌面句柄獲取,自定義動態(tài)桌面壁紙實現等。
大致可以整理出我們需要分為以下幾步完成:
- ui排版布局設計,確認動態(tài)壁紙功能設計
- 加載視頻,對視頻進行預覽讀取,保存視頻路徑等
- 動態(tài)壁紙功能實現應用,獲取桌面句柄,輪播加載視頻
- 關閉動態(tài)壁紙,在線壁紙資源獲取等
二、實現步驟
之前有粉絲反饋說,想自己跟著文章自己敲敲代碼,但是不知道具體需要哪些模塊、包文件,后面我就把所有用到模塊先放出來。
|
1
2
3
4
5
6
7
8
9
10
11
12
13
14
|
import osimport sysfrom subprocess import callfrom threading import threadfrom time import sleepimport cv2from pyqt5 import qtcore, qtwidgetsfrom pyqt5.qtcore import qt, qtimerfrom pyqt5.qtgui import qimage, qpixmap, qiconfrom pyqt5.qtwidgets import qgridlayout, qpushbutton, qmainwindow, qfiledialog, qlabel, qsystemtrayicon, \ qaction, qmenu, qmessageboxfrom os import path as pathq |
1. ui排版布局設計
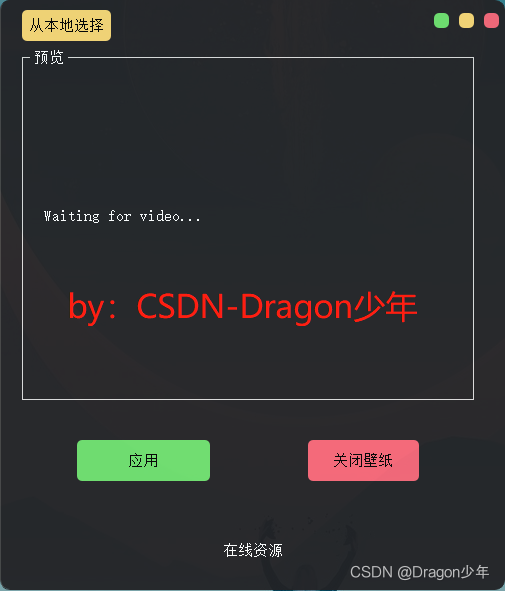
根據動態(tài)壁紙所需要的功能,首先進行ui布局設計,我們這次還是使用的pyqt5。主要包含了加載讀取本地視頻、視頻加載預覽、動態(tài)壁紙應用、動態(tài)壁紙關閉等。核心設計代碼如下:
|
1
2
3
4
5
6
7
8
9
10
11
12
13
14
15
16
17
18
19
20
21
22
23
24
25
26
27
28
29
30
31
32
33
34
35
36
37
38
39
40
41
42
43
44
45
46
47
48
49
50
51
52
53
54
55
56
57
58
59
60
61
62
63
64
65
66
67
68
69
70
71
72
73
74
75
76
77
78
79
80
81
82
83
84
85
86
87
88
89
90
91
92
93
94
|
# author:服務器之家def setupui(self, mainwindow): mainwindow.setobjectname("mainwindow") mainwindow.resize(505, 615) mainwindow.settoolbuttonstyle(qtcore.qt.toolbuttonicononly) self.centralwidget = qtwidgets.qwidget(mainwindow) self.centralwidget.setobjectname("centralwidget") self.pushbutton = qtwidgets.qpushbutton(self.centralwidget) self.pushbutton.setgeometry(qtcore.qrect(22, 10, 89, 31)) self.pushbutton.setobjectname("pushbutton") self.pushbutton.clicked.connect(self.openmp4) self.pushbutton.setstylesheet( '''qpushbutton{background:#f7d674;border-radius:5px;}qpushbutton:hover{background:yellow;}''') self.groupbox = qtwidgets.qgroupbox(self.centralwidget) self.groupbox.setgeometry(qtcore.qrect(22, 50, 452, 351)) self.groupbox.setobjectname("groupbox") self.widget = qtwidgets.qwidget(self.groupbox) self.widget.setgeometry(qtcore.qrect(11, 20, 430, 291)) self.widget.setobjectname("widget") self.gridlayout_3 = qtwidgets.qgridlayout(self.widget) self.gridlayout_3.setobjectname("gridlayout_3") self.label = qlabel(self) self.label.resize(400, 300) self.label.settext("waiting for video...") self.gridlayout_3.addwidget(self.label) self.close_widget = qtwidgets.qwidget(self.centralwidget) self.close_widget.setgeometry(qtcore.qrect(420, 0, 93, 41)) self.close_widget.setobjectname("close_widget") self.close_layout = qgridlayout() # 創(chuàng)建左側部件的網格布局層 self.close_widget.setlayout(self.close_layout) # 設置左側部件布局為網格 self.left_close = qpushbutton("") # 關閉按鈕 self.left_close.clicked.connect(self.close) self.left_visit = qpushbutton("") # 空白按鈕 #self.left_visit.clicked.connect(mainwindow.big) self.left_mini = qpushbutton("") # 最小化按鈕 self.left_mini.clicked.connect(mainwindow.mini) self.close_layout.addwidget(self.left_mini, 0, 0, 1, 1) self.close_layout.addwidget(self.left_close, 0, 2, 1, 1) self.close_layout.addwidget(self.left_visit, 0, 1, 1, 1) self.left_close.setfixedsize(15, 15) # 設置關閉按鈕的大小 self.left_visit.setfixedsize(15, 15) # 設置按鈕大小 self.left_mini.setfixedsize(15, 15) # 設置最小化按鈕大小 self.left_close.setstylesheet( '''qpushbutton{background:#f76677;border-radius:5px;}qpushbutton:hover{background:red;}''') self.left_visit.setstylesheet( '''qpushbutton{background:#f7d674;border-radius:5px;}qpushbutton:hover{background:yellow;}''') self.left_mini.setstylesheet( '''qpushbutton{background:#6ddf6d;border-radius:5px;}qpushbutton:hover{background:green;}''') self.horizontallayout = qtwidgets.qhboxlayout(self.close_widget) self.horizontallayout.setcontentsmargins(0, 0, 0, 0) self.horizontallayout.setobjectname("horizontallayout") self.pushbutton_2 = qtwidgets.qpushbutton(self.centralwidget) self.pushbutton_2.setgeometry(qtcore.qrect(77, 440, 133, 41)) self.pushbutton_2.setobjectname("pushbutton_2") self.pushbutton_2.clicked.connect(self.play) self.pushbutton_2.setstylesheet( '''qpushbutton{background:#6ddf6d;border-radius:5px;}qpushbutton:hover{background:green;}''') self.pushbutton_3 = qtwidgets.qpushbutton(self.centralwidget) self.pushbutton_3.setgeometry(qtcore.qrect(308, 440, 111, 41)) self.pushbutton_3.setobjectname("pushbutton_3") self.pushbutton_3.clicked.connect(self.close_wall) self.pushbutton_3.setstylesheet( '''qpushbutton{background:#f76677;border-radius:5px;}qpushbutton:hover{background:red;}''') self.pushbutton_4 = qtwidgets.qpushbutton(self.centralwidget) self.pushbutton_4.setgeometry(qtcore.qrect(187, 540, 133, 21)) self.pushbutton_4.setobjectname("pushbutton_4") self.pushbutton_4.clicked.connect(self.openurl) self.pushbutton_4.setstylesheet( '''qpushbutton{background:#222225;color:white;border-radius:5px;}qpushbutton:hover{background:#222225;color:skyblue}''') mainwindow.setcentralwidget(self.centralwidget) self.menubar = qtwidgets.qmenubar(mainwindow) self.menubar.setgeometry(qtcore.qrect(0, 0, 505, 23)) self.menubar.setobjectname("menubar") mainwindow.setmenubar(self.menubar) self.statusbar = qtwidgets.qstatusbar(mainwindow) self.statusbar.setobjectname("statusbar") mainwindow.setstatusbar(self.statusbar) self.retranslateui(mainwindow) qtcore.qmetaobject.connectslotsbyname(mainwindow) self.groupbox.setstylesheet(''' color:white ''') mainwindow.setwindowopacity(0.95) # 設置窗口透明度 mainwindow.setattribute(qt.wa_translucentbackground) mainwindow.setwindowflag(qt.framelesswindowhint) # 隱藏邊框# author:服務器之家def retranslateui(self, mainwindow): _translate = qtcore.qcoreapplication.translate mainwindow.setwindowtitle(_translate("mainwindow", "mainwindow")) self.pushbutton.settext(_translate("mainwindow", "從本地選擇")) self.groupbox.settitle(_translate("mainwindow", "預覽")) self.pushbutton_2.settext(_translate("mainwindow", "應用")) self.pushbutton_3.settext(_translate("mainwindow", "關閉壁紙")) self.pushbutton_4.settext(_translate("mainwindow", "在線資源")) |
ui實現效果如下:

ui布局設計完成,下面我們開始進行視頻讀取加載、預覽功能實現。
2. 視頻加載預覽
接來下我們可以根據自己喜歡的視頻,從本地讀取視頻,并且將視頻預覽播放顯示。這里視頻演示,博主還是用之前的那篇紫顏小姐姐的跳舞視頻進行演示。
讀取視頻:
讀取視頻我們可以通過打開文件對話框,選擇視頻資源,開啟一個子線程用來進行視頻開啟停止播放。核心代碼如下:
|
1
2
3
4
5
6
7
8
9
10
11
12
13
14
|
# author:服務器之家def openmp4(self): try: global path path, filetype = qfiledialog.getopenfilename(none, "選擇文件", '.', "視頻文件(*.avi;*.mov;*.rmvb;*.rm;*.flv;*.mp4;*.3gp)") # ;;all files (*) if path == "": # 未選擇文件 return self.slotstart() t = thread(target=self.stop) t.start() # 啟動線程,即讓線程開始執(zhí)行 except exception as e: print (e) |
視頻流讀取播放:
接下來,我們需要對視頻文件進行按幀讀取加載顯示,并通過計時器實現動畫效果。核心代碼如下:
|
1
2
3
4
5
6
7
8
9
10
11
12
13
14
15
16
17
18
19
20
21
22
23
24
25
|
# author:服務器之家def slotstart(self): videoname = path if videoname != "": # “”為用戶取消 self.cap = cv2.videocapture(videoname) self.timer_camera.start(50) self.timer_camera.timeout.connect(self.openframe)# author:服務器之家def openframe(self): if (self.cap.isopened()): ret, self.frame = self.cap.read() if ret: frame = cv2.cvtcolor(self.frame, cv2.color_bgr2rgb) if self.detectflag == true: # 檢測代碼self.frame self.label_num.settext("there are " + str(5) + " people.") height, width, bytespercomponent = frame.shape bytesperline = bytespercomponent * width q_image = qimage(frame.data, width, height, bytesperline, qimage.format_rgb888).scaled(self.label.width(), self.label.height()) self.label.setpixmap(qpixmap.fromimage(q_image)) else: self.cap.release() self.timer_camera.stop() # 停止計時器 |
至此,我們已經可以實現視頻讀取加載,并且進行視頻預覽了,效果如下:

3. 動態(tài)壁紙功能實現
實現桌面壁紙?zhí)鎿Q,我們首先需要獲取桌面句柄找到桌面窗體,覆寫桌面窗體、調用加載的視頻流,播放動態(tài)壁紙。
獲取桌面句柄:
|
1
2
3
4
5
6
7
8
9
10
11
12
13
14
15
16
17
18
19
|
# author:服務器之家def pretreatmenthandle(): hwnd = win32gui.findwindow("progman", "program manager") win32gui.sendmessagetimeout(hwnd, 0x052c, 0, none, 0, 0x03e8) hwnd_workw = none while 1: hwnd_workw = win32gui.findwindowex(none, hwnd_workw, "workerw", none) if not hwnd_workw: continue hview = win32gui.findwindowex(hwnd_workw, none, "shelldll_defview", none) # print('hwmd_hview: ', hview) if not hview: continue h = win32gui.findwindowex(none, hwnd_workw, "workerw", none) while h: win32gui.sendmessage(h, 0x0010, 0, 0) # wm_close h = win32gui.findwindowex(none, hwnd_workw, "workerw", none) break return hwnd |
桌面覆寫:
我們可以創(chuàng)建一個類,對窗體進行繼承,進行視頻流加載讀取播放。核心代碼如下:
|
1
2
3
4
5
6
7
8
9
10
11
12
13
14
15
16
17
18
19
20
21
22
23
24
25
26
27
28
29
30
31
32
33
34
35
36
37
38
|
# author:服務器之家class mymainwindow(qmainwindow, ui_mainwindow): def __init__(self, parent=none): super(mymainwindow, self).__init__(parent) self.ui = ui_mainwindow() self.ui.setupui(self) self.player = qmediaplayer() self.player.setnotifyinterval(10000) self.player.setvideooutput(self.ui.videowidget) self.player.setmuted(bool(1 - self.player.ismuted())) self.setwindowflags(qt.framelesswindowhint) self.setupui(self) self.go() # author: 服務器之家 def go(self): self.ui.videowidget.setfullscreen(true) with open("./filename.txt", 'r', encoding='utf-8') as f: file_name = f.read() if file_name =='': file_name = 'lkf.mp4' print (file_name) if not os.path.exists(file_name): sys.exit() media = qmediacontent(qurl(file_name)) self.player.setmedia(media) self.mplaylist = qmediaplaylist() self.mplaylist.addmedia(qmediacontent(qurl.fromlocalfile(file_name))) self.player.setplaylist(self.mplaylist) self.mplaylist.setplaybackmode(qmediaplaylist.currentiteminloop) win_hwnd = int(self.winid()) video_h = int(self.ui.videowidget.winid()) win32gui.setparent(win_hwnd, h) win32gui.setparent(video_h, h) win32gui.setparent(video_h, win_hwnd) self.player.play() |
這里我們把上面的py文件直接打包成exe文件,接下來我們在“應用”控件上進行事件綁定,直接調用exe執(zhí)行,實現動態(tài)壁紙播放應用功能。核心代碼如下:
|
1
2
3
4
5
6
7
8
9
10
11
12
13
14
15
16
17
18
19
20
21
22
23
24
25
26
|
def play(self): if path == '': reply = qtwidgets.qmessagebox.question(self, '提示', "未加載選擇視頻", qtwidgets.qmessagebox.yes) return with open("./filename.txt", 'w', encoding='utf-8') as f: f.truncate(0) print(f.write(str(path))) try: try: call('taskkill /f /im play.exe') except: pass os.system('start play.exe') except: pass try: if self.cap != []: self.cap.release() self.timer_camera.stop() # 停止計時器 else: warming = qmessagebox.warning(self, "warming", "push the left upper corner button to quit.", qmessagebox.yes) except: pass |
這樣,我們就完成了動態(tài)壁紙加載應用功能了,效果如下:

4. 關閉動態(tài)壁紙
最后我們再實現下當前動態(tài)壁紙播放關閉功能,我們需要對當前桌面視頻播放進行釋放取消。代碼如下:
|
1
2
3
4
5
6
|
# author:服務器之家 def close_wall(self): try: call('taskkill /f /im play.exe') except: pass |
效果如下:

至此,整個自定義動態(tài)桌面壁紙功能就全部完成了,下面我們一起運行下看看動態(tài)壁紙效果。
到此這篇關于使用python做個自定義動態(tài)壁紙的文章就介紹到這了,更多相關python做動態(tài)壁紙內容請搜索服務器之家以前的文章或繼續(xù)瀏覽下面的相關文章希望大家以后多多支持服務器之家!
原文鏈接:https://blog.csdn.net/hhladminhhl/article/details/119902562


