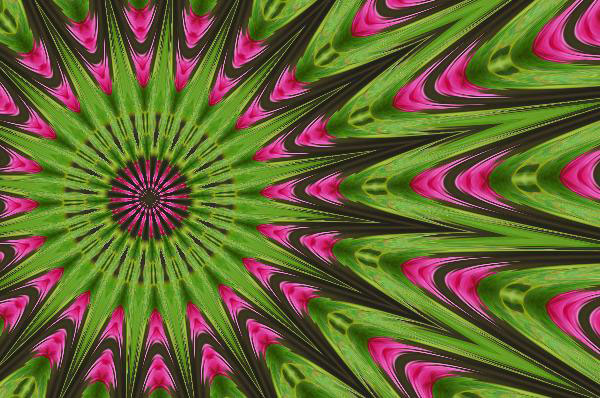
本文實例講述了Python實現PS濾鏡的萬花筒效果。分享給大家供大家參考,具體如下:
這里用 Python 實現 PS 的一種濾鏡效果,稱為萬花筒。也是對圖像做各種扭曲變換,最后圖像呈現的效果就像從萬花筒中看到的一樣:
圖像的效果可以參考附錄說明。具體Python代碼如下:
|
1
2
3
4
5
6
7
8
9
10
11
12
13
14
15
16
17
18
19
20
21
22
23
24
25
26
27
28
29
30
31
32
33
34
35
36
37
38
39
40
41
42
43
44
45
46
47
48
49
50
51
52
53
54
55
56
57
58
59
60
61
62
63
64
65
66
67
68
69
70
71
72
|
import matplotlib.pyplot as pltfrom skimage import iofrom skimage import img_as_floatimport numpy as npimport numpy.matlibimport mathfile_name='D:/Visual Effects/PS Algorithm/4.jpg';img=io.imread(file_name)img = img_as_float(img)row, col, channel = img.shape# set the parametersradius = 100.0angle = math.pi/3angle2 = math.pi/4sides = 10.0# set the center of the circle, proportion of the image sizecenterX = 0.5centerY = 0.5iWidth=coliHeight=rowcenter_x=iWidth*centerXcenter_y=iHeight*centerYxx = np.arange (col)yy = np.arange (row)x_mask = numpy.matlib.repmat (xx, row, 1)y_mask = numpy.matlib.repmat (yy, col, 1)y_mask = np.transpose(y_mask)xx_dif = x_mask - center_xyy_dif = y_mask - center_yr = np.sqrt(xx_dif * xx_dif + yy_dif * yy_dif)theta = np.arctan2(yy_dif, xx_dif+0.0001) - angle - angle2temp_theta=theta/math.pi*sides*0.5temp_r = np.mod(temp_theta, 1.0)mask_1 = temp_r < 0.5theta = temp_r * 2 * mask_1 + (1-temp_r) * 2 * (1 - mask_1)radius_c=radius/np.cos(theta)temp_r = np.mod (r/radius_c, 1.0)mask_1 = temp_r < 0.5r = radius_c * (temp_r * 2 * mask_1 + (1-temp_r) * 2 * (1 - mask_1))theta = theta + anglex1_mask = r * np.cos(theta) + center_xy1_mask = r * np.sin(theta) + center_ymask = x1_mask < 0x1_mask = x1_mask * (1 - mask)mask = x1_mask > (col - 1)x1_mask = x1_mask * (1 - mask) + (x1_mask * 0 + col -2) * maskmask = y1_mask < 0y1_mask = y1_mask * (1 - mask)mask = y1_mask > (row -1)y1_mask = y1_mask * (1 - mask) + (y1_mask * 0 + row -2) * maskimg_out = img * 1.0int_x = np.floor (x1_mask)int_x = int_x.astype(int)int_y = np.floor (y1_mask)int_y = int_y.astype(int)p_mask = x1_mask - int_xq_mask = y1_mask - int_yimg_out = img * 1.0for ii in range(row): for jj in range (col): new_xx = int_x [ii, jj] new_yy = int_y [ii, jj]# p = p_mask[ii, jj]# q = q_mask[ii, jj] img_out[ii, jj, :] = img[new_yy, new_xx, :]plt.figure (1)plt.imshow (img)plt.axis('off')plt.figure (2)plt.imshow (img_out)plt.axis('off')plt.show() |
附:PS 濾鏡萬花筒效果原理
|
1
2
3
4
5
6
7
8
9
10
11
12
13
14
15
16
17
18
19
20
21
22
23
24
25
26
27
28
29
30
31
32
33
34
35
36
37
38
39
40
41
42
43
44
45
46
47
48
49
50
51
52
53
54
|
clc;clear all;close all;addpath('E:\PhotoShop Algortihm\Image Processing\PS Algorithm');I=imread('4.jpg');I=double(I);Image=I/255;sz=size(Image);% set the parametersradius = 150;angle = pi/4;angle2=pi/4;sides=10;centerX = 0.5; % set the center of the circle, proportion of the image sizecenterY = 0.5;iWidth=sz(2);iHeight=sz(1);icenterX=iWidth*centerX;icenterY=iHeight*centerY;Image_new=Image;for i=1:sz(1) for j=1:sz(2) dx=j-icenterX; dy=i-icenterY; r=sqrt(dy*dy+dx*dx); theta=atan2(dy, dx)-angle-angle2; temp_theta=theta/pi*sides*0.5 ; theta=triangle(temp_theta); if (radius) c=cos(theta); radius_c=radius/c; r=radius_c * triangle(r/radius_c); end theta=theta+angle; x=r * cos(theta)+icenterX; y=r * sin(theta)+icenterY; if (x<=1) x=1; end if (x>=sz(2)) x=sz(2)-1; end; if (y>=sz(1)) y=sz(1)-1; end; if (y<1) y=1; end;% % % if (x<=1) continue; end% % % if (x>=sz(2)) continue; end;% % % if (y>=sz(1)) continue; end;% % % if (y<1) continue; end; x1=floor(x); y1=floor(y); p=x-x1; q=y-y1; Image_new(i,j,:)=(1-p)*(1-q)*Image(y1,x1,:)+p*(1-q)*Image(y1,x1+1,:)... +q*(1-p)*Image(y1+1,x1,:)+p*q*Image(y1+1,x1+1,:); endendimshow(Image_new)imwrite(Image_new, 'out.jpg'); |
參考來源:http://www.jhlabs.com/index.html
原圖:

效果圖:


希望本文所述對大家Python程序設計有所幫助。
原文鏈接:http://blog.csdn.net/matrix_space/article/details/72303510


