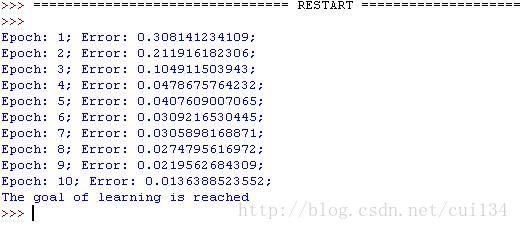
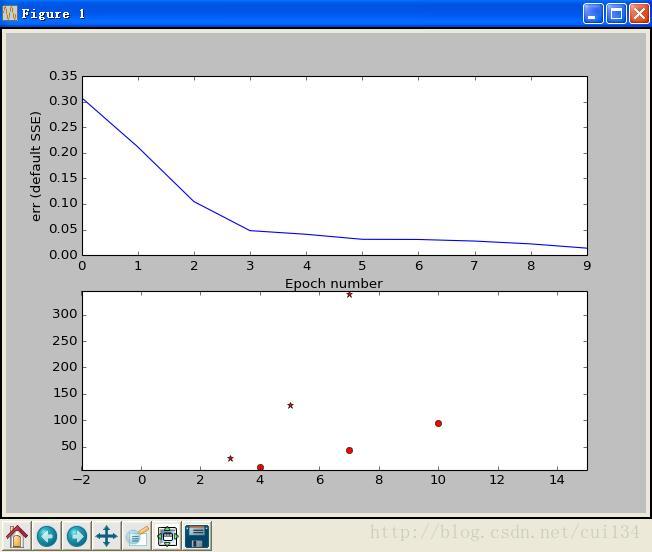
前面兩篇文章都是參考書本神經網絡的原理,一步步寫的代碼,這篇博文里主要學習了如何使用neurolab庫中的函數來實現神經網絡的算法。
首先介紹一下neurolab庫的配置:
選擇你所需要的版本進行下載,下載完成后解壓。
neurolab需要采用python安裝第三方軟件包的方式進行安裝,這里介紹一種安裝方式:
(1)進入cmd窗口
(2)進入解壓文件所在目錄下
(3)輸入 setup.py install
這樣,在python安裝目錄的Python27\Lib\site-packages下,就可以看到neurolab的文件夾了,然后就可以使用neurolab庫了。
使用neurolab庫編寫的代碼如下:
|
1
2
3
4
5
6
7
8
9
10
11
12
13
14
15
16
17
18
19
20
21
22
23
24
25
26
27
28
29
30
|
import numpy as np import matplotlib.pyplot as plt import neurolab as nl input = np.array([[4,11],[7,340],[10,95],[3,29],[7,43],[5,128]]) target=np.array([[1],[0],[1],[0],[1],[0]]) #2層網絡,5個輸入節點,一個輸出節點 net=nl.net.newff([[3,10],[11,400]],[5,1]) err=net.train(input,target,epochs=500, show=1, goal=0.02) out=net.sim(input) mymean=np.mean(out) x_max=np.max(input[:,0])+5x_min=np.min(input[:,0])-5y_max=np.max(input[:,1])+5y_min=np.min(input[:,1])-5plt.subplot(211) #誤差曲線 plt.plot(range(len(err)),err) plt.xlabel('Epoch number') plt.ylabel('err (default SSE)') plt.subplot(212) #可視化圖 plt.xlim(x_min,x_max) plt.ylim(y_min,y_max) for i in xrange(0,len(input)): if out[i]>mymean: plt.plot(input[i,0],input[i,1],'ro') else: plt.plot(input[i,0],input[i,1],'r*') plt.show() |


以上就是本文的全部內容,希望對大家的學習有所幫助,也希望大家多多支持服務器之家。
原文鏈接:http://blog.csdn.net/cui134/article/details/26841073


