一、安裝postgresql13-server
|
1
2
|
yum install -y https://download.postgresql.org/pub/repos/yum/reporpms/EL-7-x86_64/pgdg-redhat-repo-latest.noarch.rpmyum install -y postgresql13-server |
二、初始化PostgreSQL
先創建postgresql儲存目錄
|
1
2
|
mkdir /home/pgsql-13chmod 777 /home/pgsql-13 #授予權限,否則后續初始化是會報錯 |
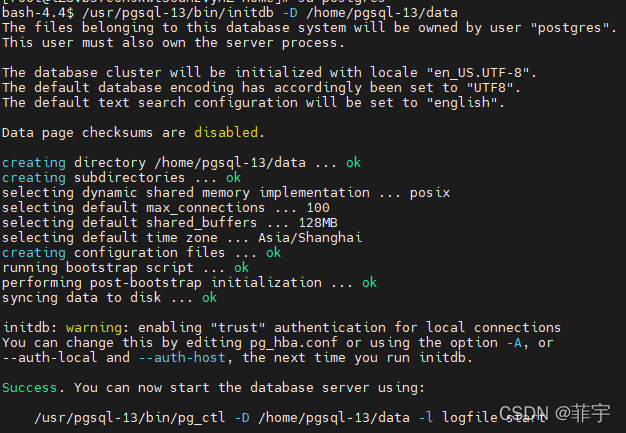
切換postgres用戶正式初始化
|
1
2
|
su postgres /usr/pgsql-13/bin/initdb -D /home/pgsql-13/data |

三、啟動postgresql數據庫
|
1
2
|
cd /home/pgsql-13/usr/pgsql-13/bin/pg_ctl -D /home/pgsql-13/data -l logfile start |
這里注意繼續使用postgres用戶操作,否則會報錯

四、修改配置文件和創建數據庫密碼和數據庫
|
1
2
3
4
5
6
7
|
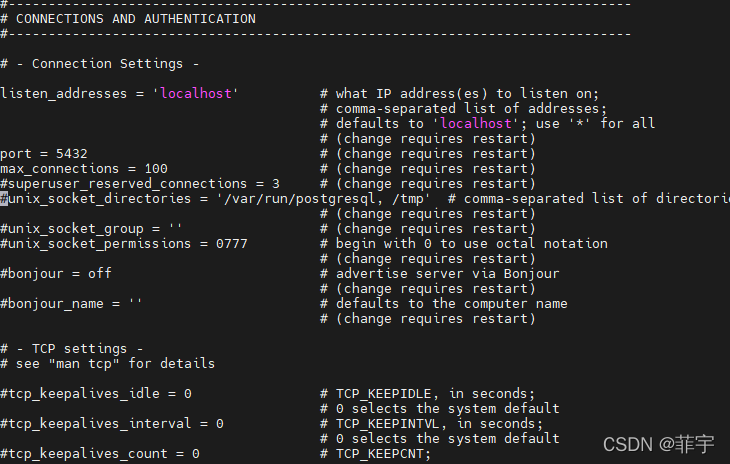
vi /home/pgsql-13/data/postgresql.conflisten_addresses = ‘localhost' #開放本地登錄port = 5432 #開放登錄端口psqlALTER USER postgres WITH PASSWORD '(123456)'; #將123456替換成自己設定的數據庫密碼CREATE DATABASE mytest; #創建數據庫\q #退出操作 |
結果如下圖:

五、添加遠程訪問權限:
|
1
2
|
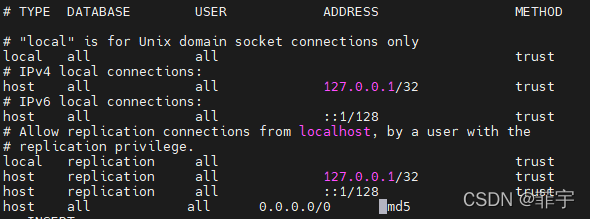
vi /home/pgsql-13/data/pg_hba.confhost all all 0.0.0.0/0 md5 #結尾處添加 |

六、配置開機啟動數據庫腳本
|
1
2
|
mkdir /home/pgsql-13/binvi /home/pgsql-13/bin/startup.sh |
輸入一下內容:
|
1
2
3
4
5
6
|
#! /bin/bashsu postgres<<!cd /home/pgsql-13/usr/pgsql-13/bin/pg_ctl -D /home/pgsql-13/data -l logfile startexit $?! |
添加腳本路徑
|
1
2
3
|
chmod -R 755 startup.shvi /etc/rc.local/home/pgsql-13/bin/startup.sh #在文件內容最后一行添加 |
七、數據庫定時備份腳本
|
1
2
3
4
|
mkdir -p /home/pgsql-13/backdatachmod 777 /home/pgsql-13/backdatamkdir -p /home/pgsql-13/backdata/binvi /home/pgsql-13/backdata/bin/backup.sh |
輸入如下內容:
|
1
2
3
4
5
|
#! /bin/basht=KaTeX parse error: Expected group after '_' at position 112: …ip > backupfile_?t.sql.gzfind /home/pgsql-13/backdata -mtime 7 -type f|xargs rm -fexit $?! |
配置定時任務:
|
1
|
12 2 * * * /home/pgsql-13/backdata/bin/backup.sh |
參考網站:https://www.postgresql.org/download/linux/redhat/
PostgreSQL 13.1 手冊 http://postgres.cn/docs/13/index.html
到此這篇關于Centos8-stream安裝PostgreSQL13的文章就介紹到這了,更多相關Centos8安裝PostgreSQL13內容請搜索服務器之家以前的文章或繼續瀏覽下面的相關文章希望大家以后多多支持服務器之家!
原文鏈接:https://blog.csdn.net/bbwangj/article/details/123114413


