上篇講了spring cloud注冊中心及客戶端的注冊,所以這篇主要講一下服務和服務之間是怎樣調用的
不會搭建的小伙伴請參考我上一篇博客:idea快速搭建spring cloud-注冊中心與注冊
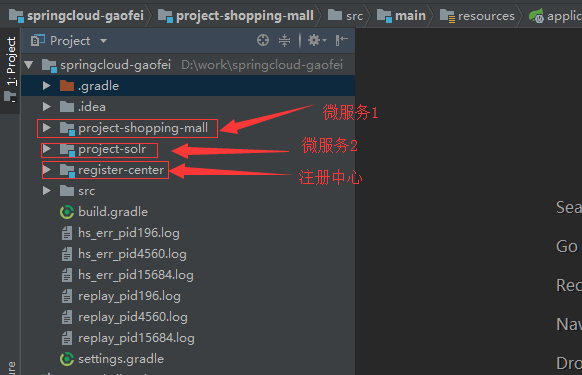
基于上一篇的搭建我又自己搭建了一個客戶端微服務:

所以現在有兩個微服務,我們所實現的就是微服務1和微服務2之間的調用
注冊中心就不用多說了,具體看一下兩個微服務

application.yml配置也不用說了,不知道怎么配置的請參考我上篇博客
在project-solr中的constroller中:
|
1
2
3
4
5
6
7
8
9
|
@restcontroller//這里使此constroller中所有的方法返回的不是頁面public class solrsearchconstroller { @requestmapping("/solrsearch") public string solrsearch(){ return "這里是solr"; }} |
這里是為了讓另一個服務調用
在另一個微服務project-shopping-mall 啟動類中,我們 必須定義一個方法:
|
1
2
3
4
5
6
7
8
9
10
11
12
13
14
15
16
|
@springbootapplication@enablediscoveryclient //表示eureka客戶端public class shoppingmallprovider { @bean @loadbalanced//在注冊中心里進行查找微服務 public resttemplate resttemplate(){ resttemplate resttemplate=new resttemplate(); return resttemplate; } public static void main(string[] args) { springapplication.run(shoppingmallprovider.class,args); }} |
然后在project-shopping-mall里的controller中調用project-solr中的constroller:
|
1
2
3
4
5
6
7
8
9
10
11
12
13
14
|
@controllerpublic class pagecontroller { @autowired private resttemplate resttemplate; @requestmapping("/toindex") public string toindex(model model){ string msg=resttemplate.getforentity("http://project-solr/solrsearch",string.class).getbody();//project-solr是調用注冊中心里的名字 model.addattribute("msg",msg); return "/index"; }} |
這里的project-solr是配置里每個服務注冊到注冊中心的名字,根據名字調用服務的ip地址,可以實現動態微服務調用效果,它不會因為更換電腦而出錯
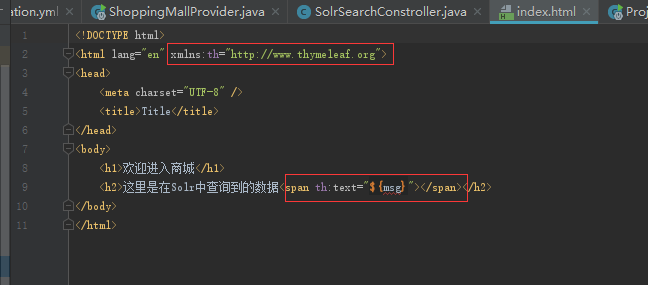
下面接著建設頁面,這里我用的是thymeleaf組件
我們先在build.gradle中添加依賴:
|
1
2
|
//thymeleaf組件 compile 'org.springframework.boot:spring-boot-starter-thymeleaf' |
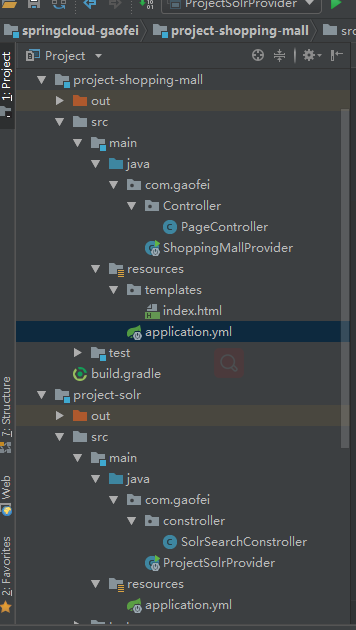
然后新建默認的目錄:

這里必須新建templates包,因為是默認的目錄
然后index.html中:

運行:

成功!
下面簡單的說一下spring cloud eureka注冊中心的自我保護機制
優點:當服務與注冊中心由于某個原因斷開的時候,服務與服務之間還可以連接,這時候eureka不會立刻清理,依舊會對改微服的信息進行保存。
缺點:當服務與注冊中心由于某個原因斷開的時候,服務與服務之間也不可以連接,這時候可能會帶壞其他服務器。
當然是優點大于缺點的
那eureka注冊中心是怎么知道微服務還存活的呢?
其實每個服務每分鐘都會對注冊中心進行心跳,而注冊中心會接受心跳,若注冊中心沒有接受到心跳則會認為該服務死亡
官方對于自我保護機制的定義:eureka官方自我保護機制
以上就是本文的全部內容,希望對大家的學習有所幫助,也希望大家多多支持服務器之家。
原文鏈接:https://www.cnblogs.com/itgaofei/p/9334741.html


