導論:初識多線程
首先,我們來討論討論什么叫做多線程。舉個簡單的例子,比如說造房子這個任務。如果只有一個人的話,他既要搬磚還得拎砂漿、攪拌水泥之類的(其他工種這里就不一一闡述了),哪怕這個工人技術再熟練,精力再旺盛,他同時也只能干一個工種。那么問題來了,該如何提升效率呢?很簡單,我們可以請多個工人同時來干活,可以同時干多種也可以干同種活兒,這樣效率就高得多。盡管他們各自可干著不同的活兒,但本質都是為了造房子這個任務,這就叫做多進程,即將一個大任務拆分成不同的小任務,分配不同的人來執行,當包工頭也就是處理器下達命令時,他們按照指令來工作。
每個工種的話,比如攪拌水泥的大工優惠叫來幾個小工,都是來干攪拌水泥這個活兒,所以這里叫做多線程。
那么,怎么區分多進程和多線程呢?這里簡單概括:
進程是系統分配資源的最小單位,線程是系統調度的最小單位。一個進程內的線程之間是可以共享資源的。 每個進程至少有一個線程存在,即主線程。
一:動手來創建多線程
1.1 創建一個主線程
請看代碼:
public class ThreadDemo1 {
  static class MyThread extends Thread {
      @Override
      public void run() {
          System.out.println("hello world, 我是一個線程");
          while (true) {

          }
      }
  }

  public static void main(String[] args) {
      // 創建線程需要使用 Thread 類, 來創建一個 Thread 的實例.
      // 另一方面還需要給這個線程指定, 要執行哪些指令/代碼.
      // 指定指令的方式有很多種方式, 此處先用一種簡單的, 直接繼承 Thread 類,
      // 重寫 Thread 類中的 run 方法.

      // [注意!] 當 Thread 對象被創建出來的時候, 內核中并沒有隨之產生一個線程(PCB).
      Thread t = new MyThread();
      // 執行這個 start 方法, 才是真的創建出了一個線程.
      // 此時內核中才隨之出現了一個 PCB, 這個 PCB 就會對應讓 CPU 來執行該線程的代碼. (上面的 run 方法中的邏輯)
      t.start();

      while (true) {
          // 這里啥都不干
      }
  }
}
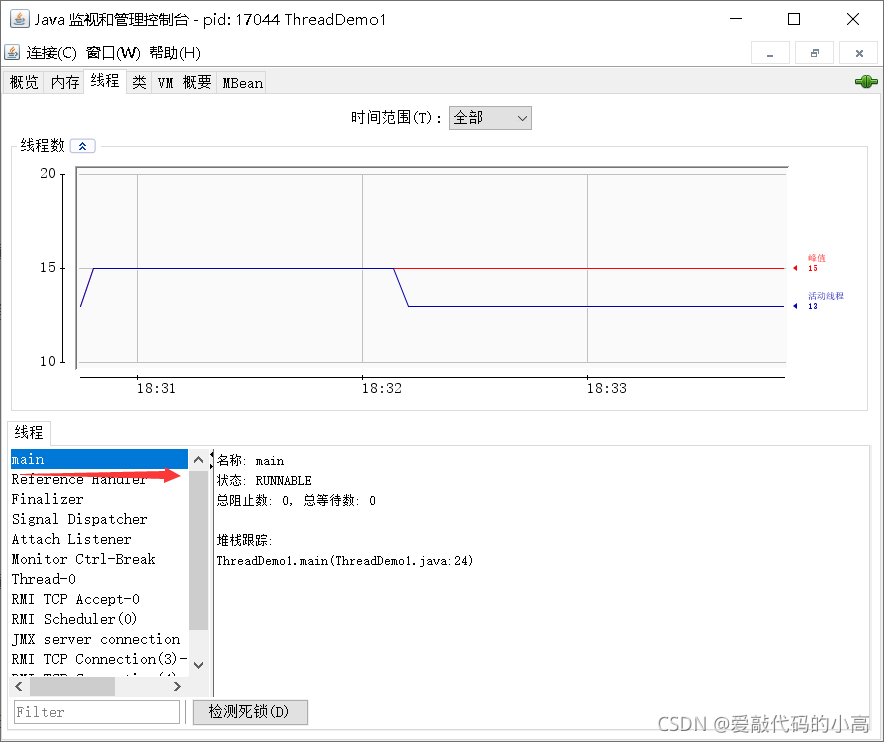
接下里,我們可以通過jdk里面的一個jconsole來查看,我的文件路徑是C:\Program Files\Java\jdk1.8.0_192\bin,大家可以對照自己安裝的jdk文件位置來尋找。運行程序,打開jconsole可以看下

這里這個主線程就是我們創建的線程,線程創建成功。
1.2 多線程搶占式執行
創建兩個線程,輸出線程運行前后時間,多次運行發現運行時間不一,這里就體現了現成的搶占式執行方法,看代碼:
public class ThreadDemo2 {
  private static long count = 100_0000_0000L;

  public static void main(String[] args) {
      // serial();
      concurrency();
  }

  private static void serial() {
      long beg = System.currentTimeMillis();

      int a = 0;
      for (long i = 0; i < count; i++) {
          a++;
      }
      int b = 0;
      for (long i = 0; i < count; i++) {
          b++;
      }

      long end = System.currentTimeMillis();
      System.out.println("time: " + (end - beg) + " ms");
  }

  private static void concurrency() {
      long beg = System.currentTimeMillis();

      Thread t1 = new Thread() {
          @Override
          public void run() {
              int a = 0;
              for (long i = 0; i < count; i++) {
                  a++;
              }
          }
      };

      Thread t2 = new Thread() {
          @Override
          public void run() {
              int b = 0;
              for (long i = 0; i < count; i++) {
                  b++;
              }
          }
      };
      t1.start();
      t2.start();

      try {
          // 線程等待. 讓主線程等待 t1 和 t2 執行結束, 然后再繼續往下執行.
          t1.join();
          t2.join();
      } catch (InterruptedException e) {
          e.printStackTrace();
      }

      // t1 t2 和 main 線程之間都是并發執行的.
      // 調用了 t1.start 和 t2.start 之后, 兩個新線程正在緊鑼密鼓的進行計算過程中,
      // 此時主線程仍然會繼續執行, 下面的 end 就隨之被計算了.
      // 正確的做法應該是要保證 t1 和 t2 都計算完畢, 再來計算這個 end 的時間戳.
      long end = System.currentTimeMillis();
      System.out.println("time: " + (end - beg) + " ms");
  }
}
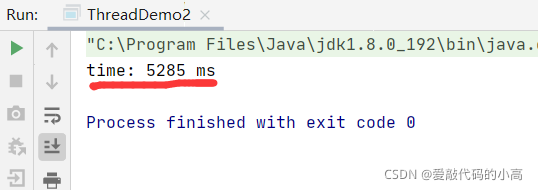
多次運行,會有以下結果:


可以發現線程是搶占式執行。
我們用join關鍵字,可以規定線程運行先后順序,比如這里規定t1運行完后t2再運行,代碼如下:
public class ThreadDemo2 {
  private static long count = 100_0000_0000L;

  public static void main(String[] args) {
       serial();
      //concurrency();
  }

  private static void serial() {
      long beg = System.currentTimeMillis();

      int a = 0;
      for (long i = 0; i < count; i++) {
          a++;
      }
      int b = 0;
      for (long i = 0; i < count; i++) {
          b++;
      }

      long end = System.currentTimeMillis();
      System.out.println("time: " + (end - beg) + " ms");
  }

  private static void concurrency() {
      long beg = System.currentTimeMillis();

      Thread t1 = new Thread() {
          @Override
          public void run() {
              int a = 0;
              for (long i = 0; i < count; i++) {
                  a++;
              }
          }
      };

      Thread t2 = new Thread() {
          @Override
          public void run() {
              int b = 0;
              for (long i = 0; i < count; i++) {
                  b++;
              }
          }
      };
      t1.start();
      t2.start();

      try {
          // 線程等待. 讓主線程等待 t1 和 t2 執行結束, 然后再繼續往下執行.
          t1.join();
          t2.join();
      } catch (InterruptedException e) {
          e.printStackTrace();
      }

      // t1 t2 和 main 線程之間都是并發執行的.
      // 調用了 t1.start 和 t2.start 之后, 兩個新線程正在緊鑼密鼓的進行計算過程中,
      // 此時主線程仍然會繼續執行, 下面的 end 就隨之被計算了.
      // 正確的做法應該是要保證 t1 和 t2 都計算完畢, 再來計算這個 end 的時間戳.
      long end = System.currentTimeMillis();
      System.out.println("time: " + (end - beg) + " ms");
  }
}
多次運行,結果如下:


這里發現,由于規定了線程運行先后時間,導致運行時間大大增長,由此體現了線程并發運行的優勢所在。
這里說明一點:由于線程是搶占式執行,所以每次結果都是不一定的,但誤差會在一定范圍內。
二:創建線程的幾個常用方法
2.2 繼承 Thread 類
可以通過繼承 Thread 來創建一個線程類,該方法的好處是 this 代表的就是當前線程,不需要通過 Thread.currentThread() 來獲取當前線程的引用。
class MyThread extends Thread {
@Override
public void run ()
{ System . out . println ( " 這里是線程運行的代碼 " );
}
}
MyThread t = new MyThread ();
t . start (); // 線程開始運行
2.2 實現 Runnable 接口
通過實現 Runnable 接口,并且調用 Thread 的構造方法時將 Runnable 對象作為 target 參數傳入來創建線程對象。 該方法的好處是可以規避類的單繼承的限制;但需要通過 Thread.currentThread() 來獲取當前線程的引用。
class MyRunnable implements Runnable {
@Override
public void run () {
System . out . println ( Thread . currentThread (). getName () + " 這里是線程運行的代碼 " );
}
}
Thread t = new Thread(new MyRunnable());
t.start(); // 線程開始運行
2.3 匿名類創建
// 使用匿名類創建 Thread 子類對象
Thread t1 = new Thread() {
@Override
public void run() {
System.out.println(" 使用匿名類創建 Thread 子類對象 ");
}
};
// 使用匿名類創建 Runnable 子類對象
Thread t2 = new Thread(new Runnable() {
@Override
public void run() {
System.out.println(" 使用匿名類創建 Runnable 子類對象 ");
}
});
// 使用 lambda 表達式創建 Runnable 子類對象
Thread t3 = new Thread(() -> System.out.println(" 使用匿名類創建 Thread 子類對象 "));
Thread t4 = new Thread(() -> {
System.out.println(" 使用匿名類創建 Thread 子類對象 ");
});
三:Thread的幾個常見屬性

代碼如下:
public class ThreadDemo {
  public static void main(String[] args) {
      Thread thread = new Thread(() -> {
          for (int i = 0; i < 10; i++) {
              try {
                  System.out.println(Thread.currentThread().getName() + ": 我還活著");
                  Thread.sleep(1 * 1000);
              } catch (InterruptedException e) {
                  e.printStackTrace();
              }
          }
          System.out.println(Thread.currentThread().getName() + ": 我即將死去");
      });
      thread.start();
      System.out.println(Thread.currentThread().getName()
              + ": ID: " + thread.getId());
      System.out.println(Thread.currentThread().getName()
              + ": 名稱: " + thread.getName());
      System.out.println(Thread.currentThread().getName()
              + ": 狀態: " + thread.getState());
      System.out.println(Thread.currentThread().getName()
              + ": 優先級: " + thread.getPriority());
      System.out.println(Thread.currentThread().getName()
              + ": 后臺線程: " + thread.isDaemon());
      System.out.println(Thread.currentThread().getName()
              + ": 活著: " + thread.isAlive());
      System.out.println(Thread.currentThread().getName()
              + ": 被中斷: " + thread.isInterrupted());

      while (thread.isAlive()) {}
      System.out.println(Thread.currentThread().getName()
              + ": 狀態: " + thread.getState());
  }
}
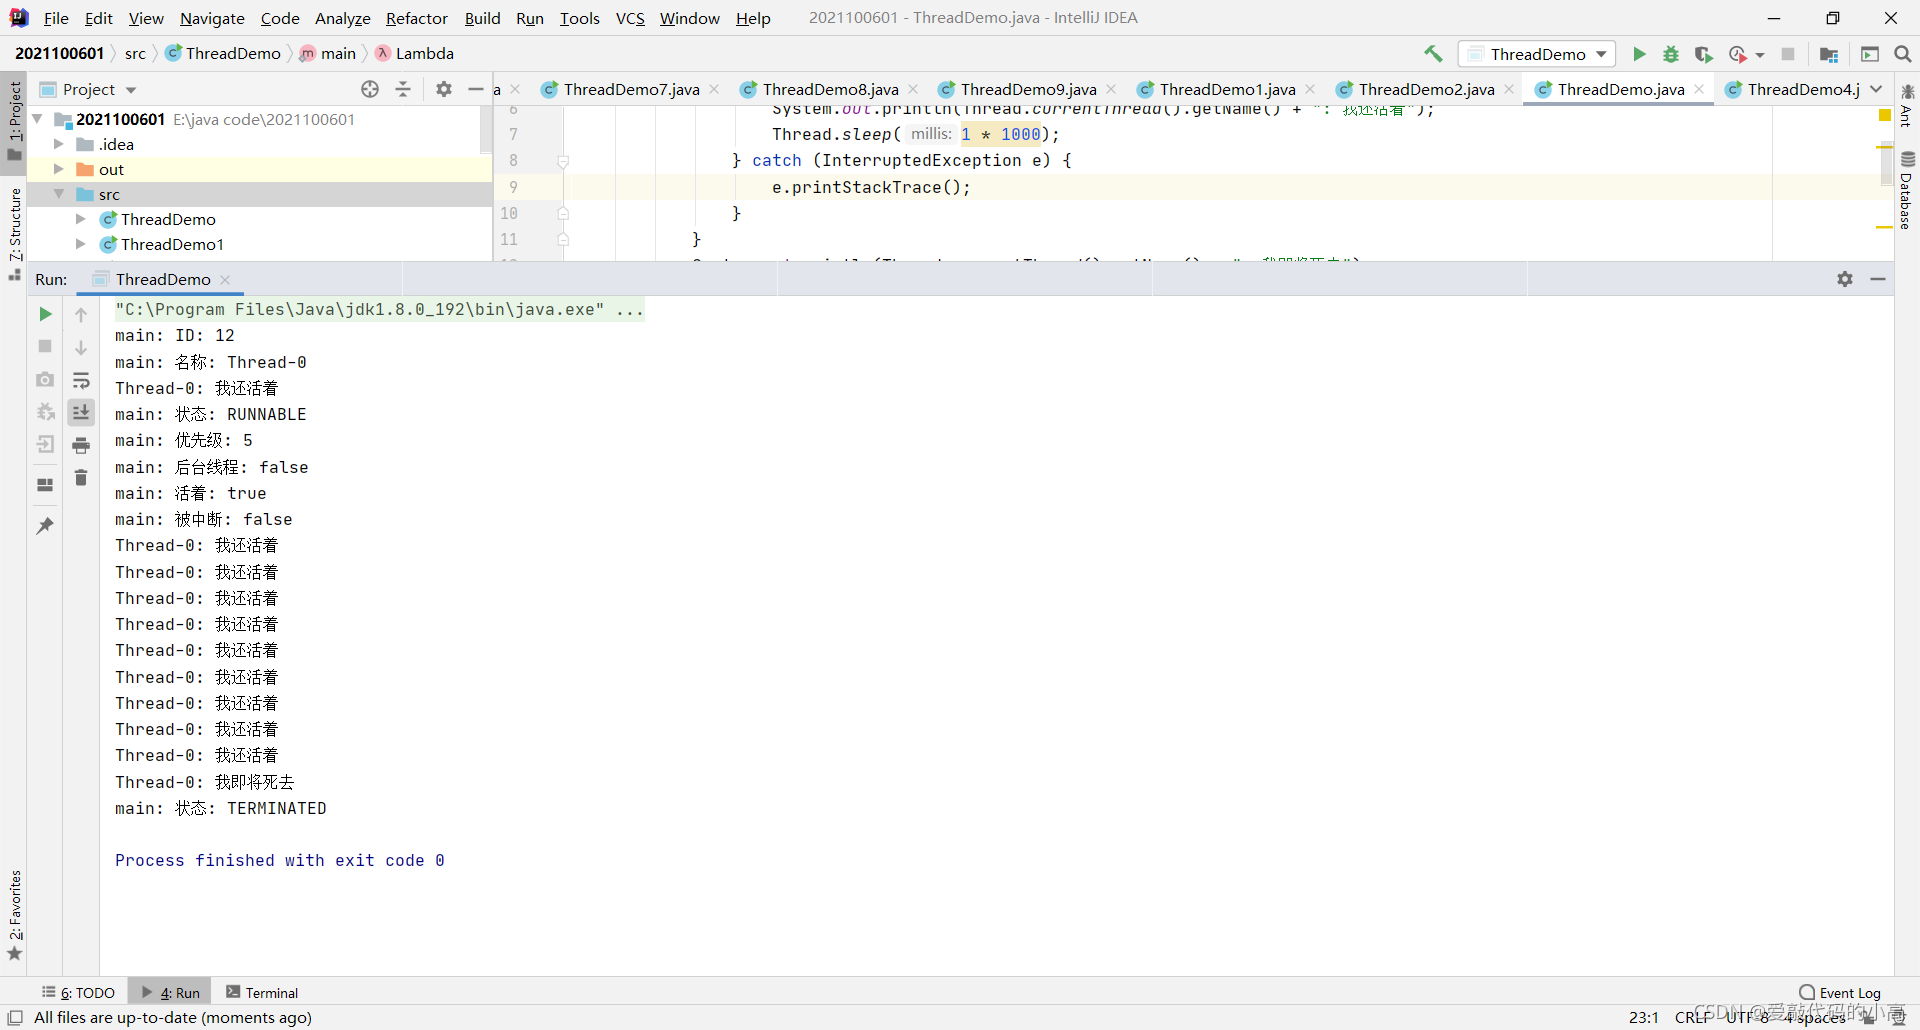
運行結果:

由此可見各個關鍵字的含義,今天的分享就到這里。
記:
最近剛開學,各種事兒,選導師,研一七天都有課,導致時間緊張,希望自己還是可以平衡好學業和代碼的關系吧,謝謝大家支持。
整理不易,大家多多支持。
到此這篇關于Java 多線程之兩步掌握的文章就介紹到這了,更多相關Java 多線程內容請搜索服務器之家以前的文章或繼續瀏覽下面的相關文章希望大家以后多多支持服務器之家!
原文鏈接:https://blog.csdn.net/qq_60202930/article/details/120627570


