前幾天在阿里云買了個服務(wù)器 ,準(zhǔn)備自己玩玩,現(xiàn)將最新版mysql(5.7.16)安裝步驟,以及遇到問題及解決過程分享如下:
第一步:下載rpm包
MySQL官網(wǎng)下載:http://dev.mysql.com/downloads/mysql/
但如果你的下載網(wǎng)速不好的話也可以點下面的鏈接下載自己想要的版本
http://mirrors.sohu.com/mysql/MySQL-5.7/
我用的是(CentOs6.5)下載的是:
mysql-5.7.16-1.el6.x86_64.rpm-bundle.tar文件
第二步:進行安裝
具體如下:
1. 檢查系統(tǒng)自帶的MySQL及相關(guān)RPM包,是否安裝
|
1
|
rpm -qa | grep -i mysql |
如果有安裝,則移除(rpm –e 名稱)
|
1
|
yum -y remove mysql |
2. 創(chuàng)建用戶和組(如果已經(jīng)創(chuàng)建則跳過)
|
1
2
|
groupadd mysql useradd -r -g mysql mysql |
3. 解壓tar文件,并安裝
進入文件目錄 運行:tar -xf mysql-5.7.16-1.el6.x86_64.rpm-bundle.tar 解壓完成,然后依次執(zhí)行。
|
1
2
3
4
|
rpm -ivh mysql-community-common-5.7.16-1.el6.x86_64.rpm rpm -ivh mysql-community-libs-5.7.16-1.el6.x86_64.rpm rpm -ivh mysql-community-client-5.7.16-1.el6.x86_64.rpm rpm -ivh mysql-community-server-5.7.16-1.el6.x86_64.rpm |
到此,mysql已經(jīng)安裝完成。
4. 基礎(chǔ)配置
執(zhí)行:service mysqld start 出現(xiàn)下圖表示安裝成功

關(guān)閉mysql服務(wù):service mysqld stop
初始化(這里是以root身份執(zhí)行的):bin/mysqld --initialize --user=mysql
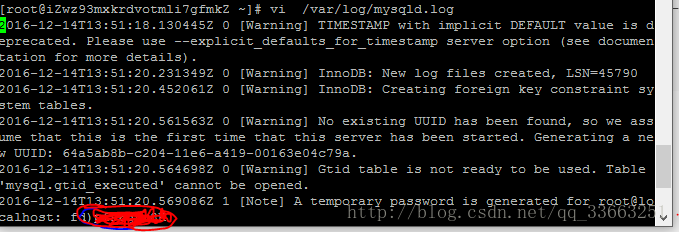
注:使用–initialize會為root賬戶生成一個隨機的初始密碼,我們可以使用命令:mysql -u root -p,然后輸入密碼來登錄MySQL。使用–initialize-insecure不會為root賬戶生成一個隨機的初始密碼,我們可以使用命令:mysql -u root –skip-password直接登錄MySQL,這里我是用的第一種。
下面我們來看下root賬戶的隨機初始密碼,執(zhí)行命令:vi /var/log/mysqld.log

啟動mysql服務(wù) : service mysqld start
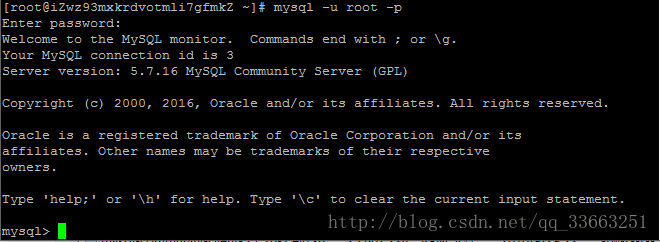
登錄:mysql -u root -p 并輸入密碼

但是,我就是在這里遇到了問題,輸入密碼后提示 :Access denied for user ‘root'@'localhost' (using password: YES) 。百度了下,回答有很多 ,試了一下,過程如下:
首先關(guān)閉MySQL服務(wù) :service mysqld stop
用mysqld_safe重啟服務(wù),執(zhí)行:mysqld_safe --user=root --skip-grant-tables --skip-networking &如果提示mysqld_safe A mysqld process already exists。執(zhí)行ps -A|grep mysql顯示當(dāng)前進程,然后執(zhí)行
kill -9 xxxx xxxx填上一步你查出的進程序號。然后執(zhí)行就沒問題了。

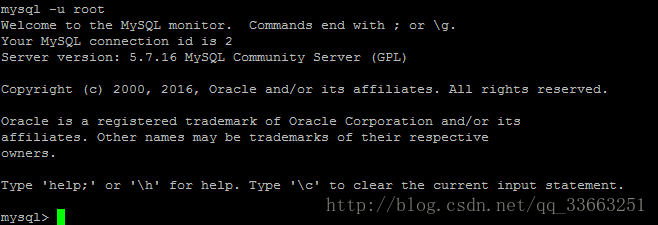
執(zhí)行 mysql -u root

網(wǎng)上的很多說法是執(zhí)行update user set password=PASSWORD('12345') where user='root';
我試了但是提示沒有password這個字段,百度了下原來5.7版本后的 password 字段變成了authentication_string,執(zhí)行update user set authentication_string=PASSWORD('12345') where user='root';果然可以。
然后 執(zhí)行:flush privileges;
最后 :quit
再次登錄 OK

然后我想讓root在其他主機上也能鏈接到此數(shù)據(jù)庫
執(zhí)行 :
|
1
|
GRANT ALL PRIVILEGES ON *.* TO 'root'@'%' IDENTIFIED BY 'mypassword' WITH |
GRANT OPTION; 提示 You must reset your password ,意思是讓我先重設(shè)一下密碼(what the xxxx)。好吧,接著來。
密碼重置,一樣先關(guān)閉mysql 服務(wù),依次執(zhí)行:
|
1
2
3
4
5
6
|
mysqld_safe --user=root --skip-networking & mysql -u root -pSET PASSWORD = PASSWORD('your new password'); ALTER USER 'root'@'localhost' PASSWORD EXPIRE NEVER; flush privileges; quit; |
注:新密碼不能太簡單,不然會提示密碼過于簡單,最好包含大小寫字母,數(shù)字,特殊字符。
一切OK
執(zhí)行 :
|
1
2
|
GRANT ALL PRIVILEGES ON *.* TO 'root'@'%' IDENTIFIED BY 'mypassword' WITHGRANT OPTION; |
重啟mysql服務(wù):service mysqld restart
測試通過。。。
以上所述是小編給大家介紹的Linux 使用rpm方式安裝最新mysql(5.7.16)步驟及常見問題解決方法,希望對大家有所幫助,如果大家有任何疑問請給我留言,小編會及時回復(fù)大家的。在此也非常感謝大家對服務(wù)器之家網(wǎng)站的支持!
原文鏈接:http://blog.csdn.net/qq_33663251/article/details/53671017


