第一步、準備gradle環境
1、去官網下載gradle
https://gradle.org/releases/
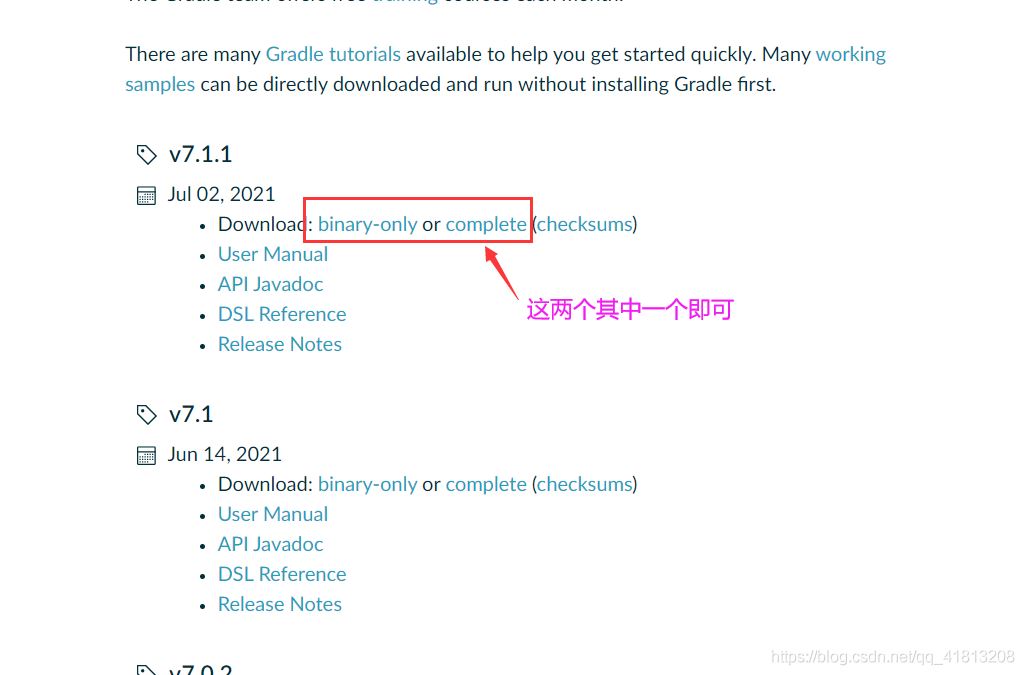
2、將其解壓縮,創建repository文件夾 和init.d文件夾
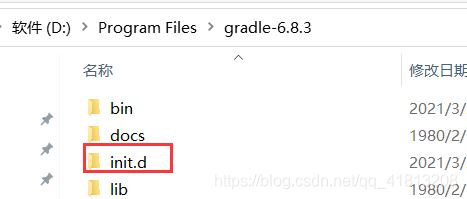
創建init.gradle文件
輸入文本信息,主要是配置阿里云鏡像倉庫地址,和maven的類似
gradle.projectsLoaded {
rootProject.allprojects {
buildscript {
repositories {
def JCENTER_URL = "https://maven.aliyun.com/repository/jcenter"
def GOOGLE_URL = "https://maven.aliyun.com/repository/google"
def NEXUS_URL = "http://maven.aliyun.com/nexus/content/repositories/jcenter"
all { ArtifactRepository repo ->
if (repo instanceof MavenArtifactRepository) {
def url = repo.url.toString()
if (url.startsWith("https://jcenter.bintray.com/")) {
project.logger.lifecycle "Repository ${repo.url} replaced by $JCENTER_URL."
println("buildscript ${repo.url} replaced by $JCENTER_URL.")
remove repo
}
else if (url.startsWith("https://dl.google.com/dl/android/maven2/")) {
project.logger.lifecycle "Repository ${repo.url} replaced by $GOOGLE_URL."
println("buildscript ${repo.url} replaced by $GOOGLE_URL.")
remove repo
}
else if (url.startsWith("https://repo1.maven.org/maven2")) {
project.logger.lifecycle "Repository ${repo.url} replaced by $REPOSITORY_URL."
println("buildscript ${repo.url} replaced by $REPOSITORY_URL.")
remove repo
}
}
}
jcenter {
url JCENTER_URL
}
google {
url GOOGLE_URL
}
maven {
url NEXUS_URL
}
}
}
}
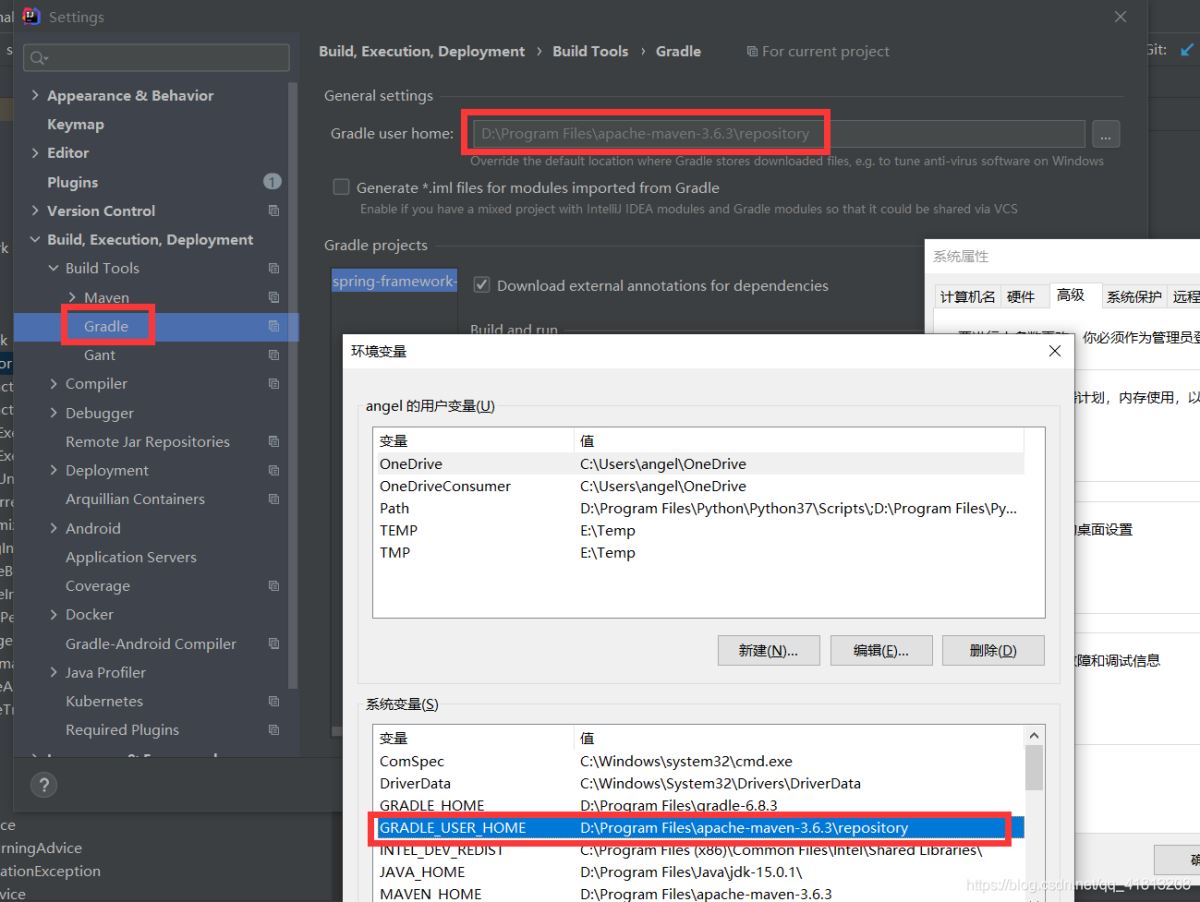
3、為了方便,設置環境變量GRADLE_HOME 和GRADLE_USER_HOME(看后面的截圖就明白會被idea使用)
GRADLE_HOME
gradle路徑,例如:
D:Program Filesgradle-6.8.3
第二步、下載spring源碼
github下載源碼比較慢,我們通過碼云的方式將其下載下來。當然也可以直接從github的官網直接拉取下拉。
spring源碼官網:https://github.com/spring-projects/spring-framework
以下是同步到碼云的操作
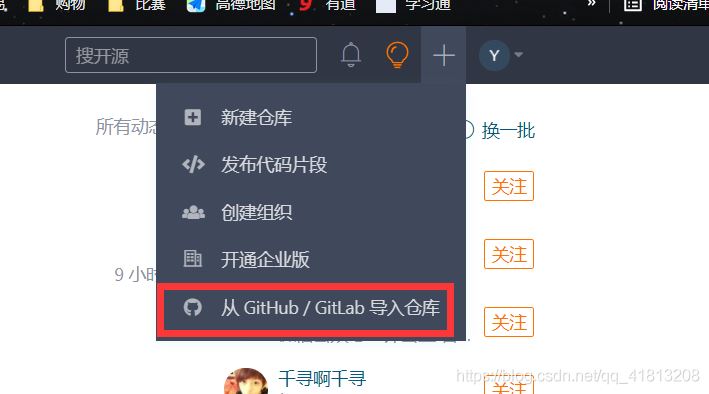
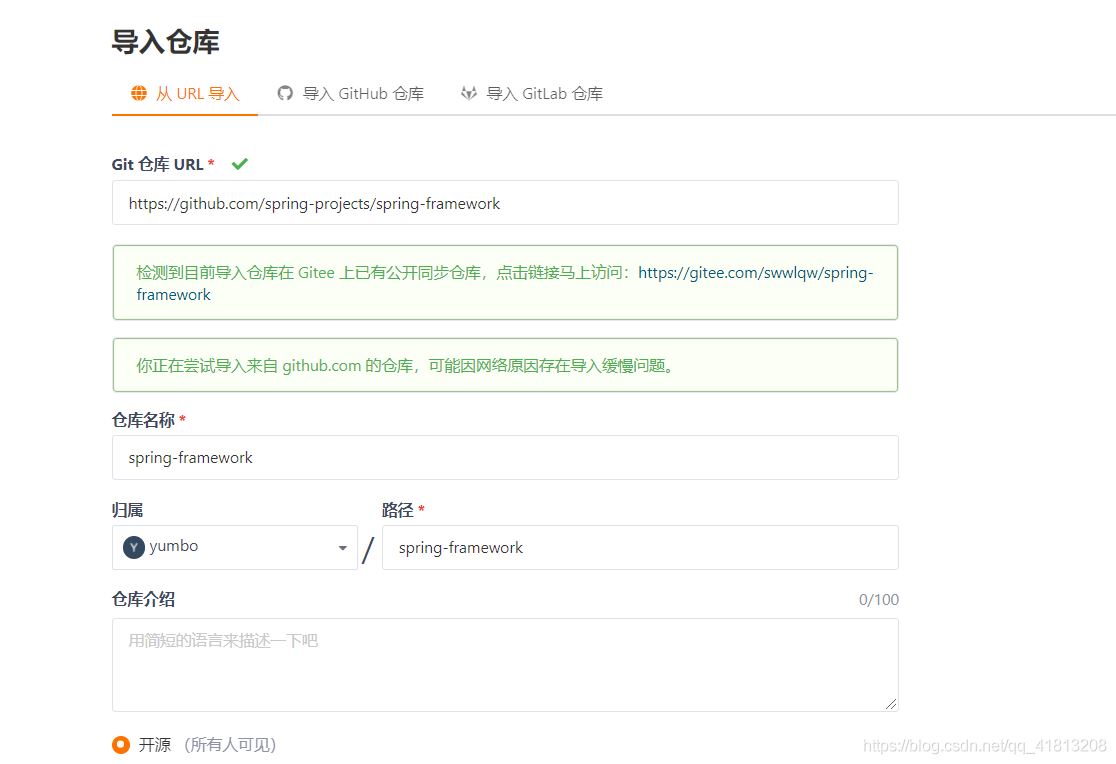
確認后就可以同步完成了
由于從碼云上拉取代碼需要ssh校驗
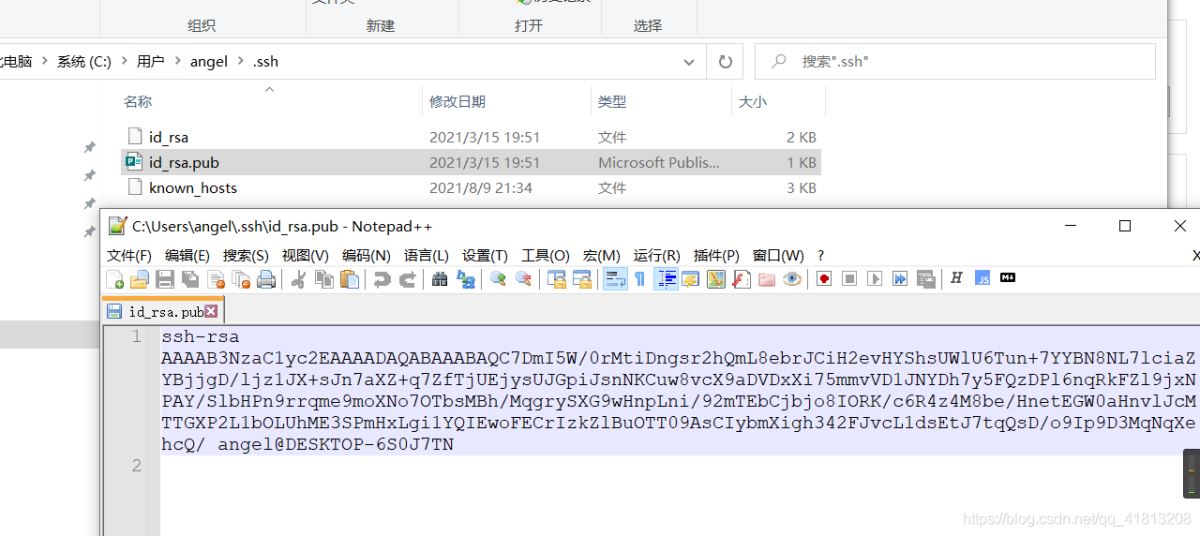
如果之前有弄過ssh-keygen -t rsa也就是在個人文件夾下有一個.ssh文件夾里面有一個公鑰
如下,講id_rsa.pub已文本打開,復制里面的內容。
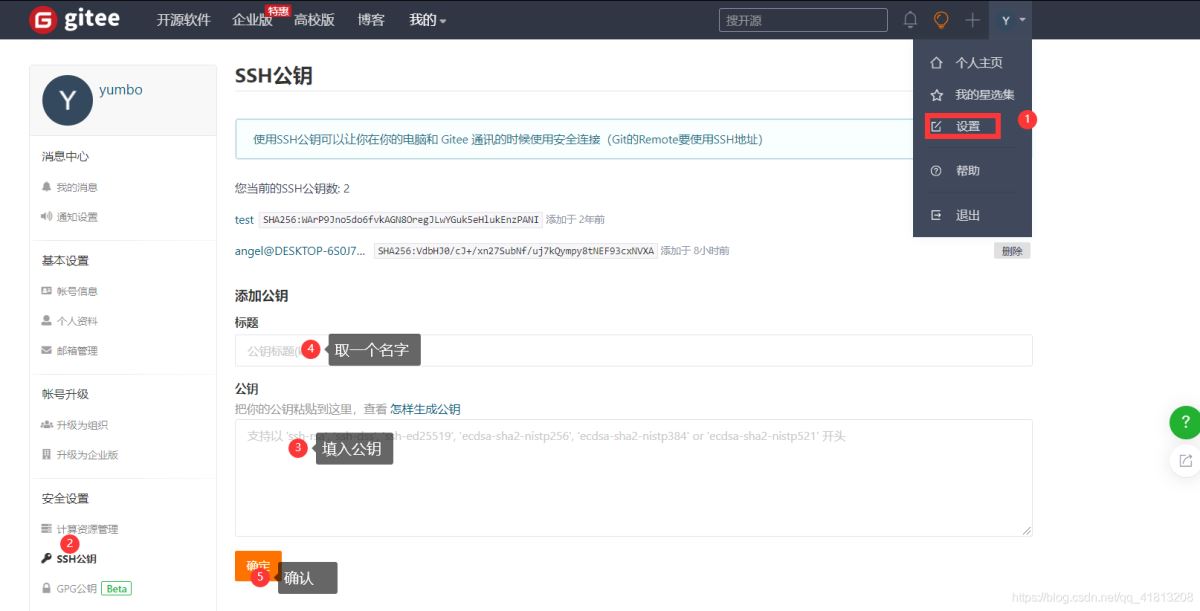
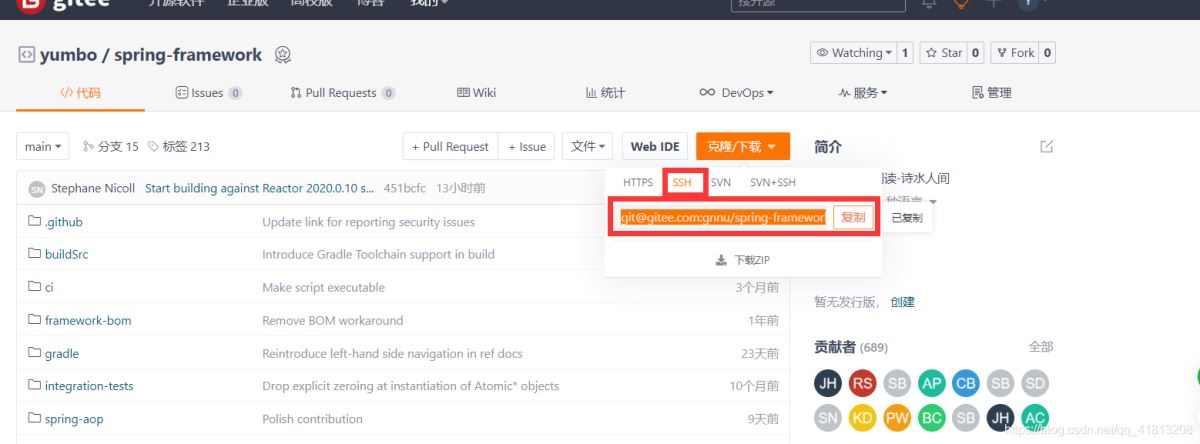
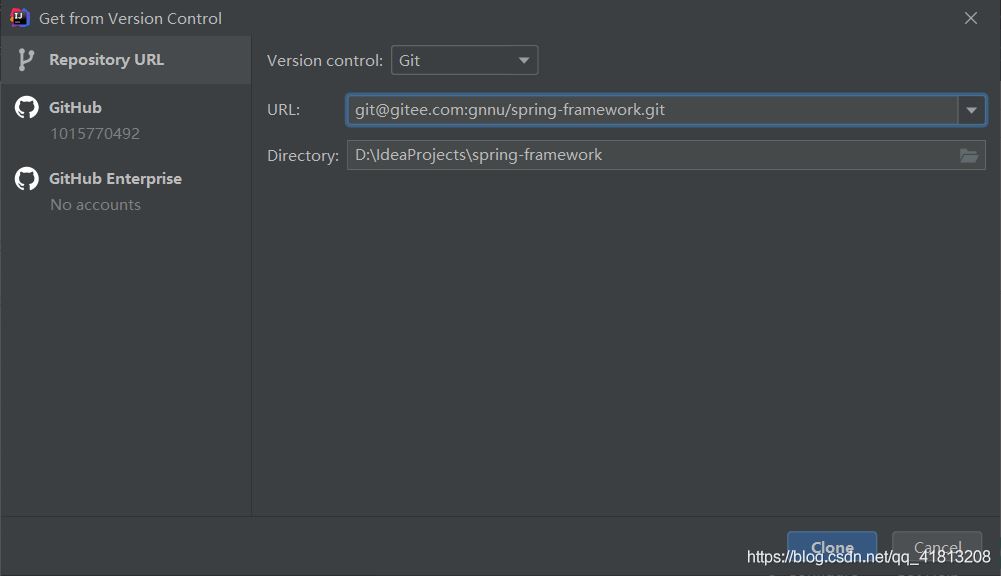
然后我們就可以通過IDEA的get from version control
復制ssh的連接,然后粘貼到idea中,與github上的git操作一致
刷新以下gradle依賴,首次刷新會非常慢,如果遇到了錯誤提示,則根據錯誤提示進行處理。完成后就會像我這樣。
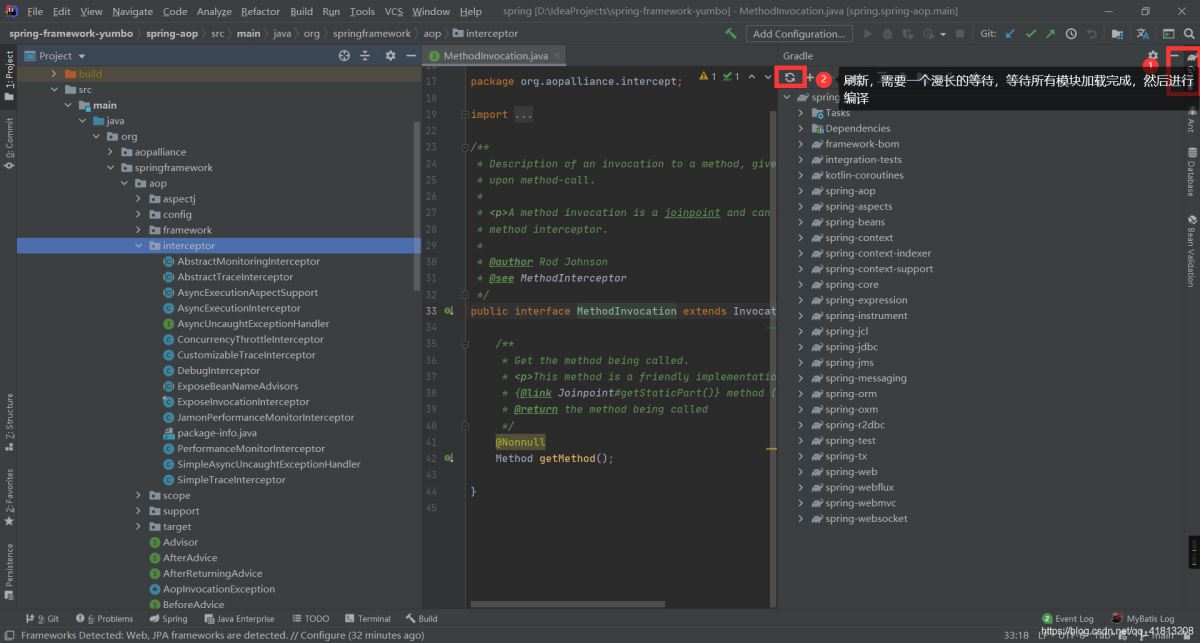
完成上面操作后spring的源碼環境就算完成了。
到此這篇關于用IDEA搭建spring源碼閱讀環境的文章就介紹到這了,更多相關idea搭建spring源碼閱讀環境內容請搜索服務器之家以前的文章或繼續瀏覽下面的相關文章希望大家以后多多支持服務器之家!
原文鏈接:https://blog.csdn.net/qq_41813208/article/details/119555733


