本節我們基于一個發表文章的案例來說明SpringBoot如何elasticsearch集成。elasticsearch本身可以是一個獨立的服務,也可以嵌入我們的web應用中,在本案例中,我們講解如何將elasticsearch嵌入我們的應用中。
案例背景:每個文章(Article)都要屬于一個教程(Tutorial),而且每個文章都要有一個作者(Author)。
一、實體設計:
Tutorial.java
|
1
2
3
4
5
6
7
|
public class Tutorial implements Serializable{ private Long id; private String name;//教程名稱 //setters and getters //toString} |
Author.java
|
1
2
3
4
5
6
7
8
9
10
11
12
13
14
15
16
17
18
|
public class Author implements Serializable{ /** * 作者id */ private Long id; /** * 作者姓名 */ private String name; /** * 作者簡介 */ private String remark; //setters and getters //toString } |
Article.java
|
1
2
3
4
5
6
7
8
9
10
11
12
13
14
15
16
17
18
19
20
|
public class Article implements Serializable{ private Long id; /**標題*/ private String title; /**摘要*/ private String abstracts; /**內容*/ private String content; /**發表時間*/ private Date postTime; /**點擊率*/ private Long clickCount; /**作者*/ private Author author; /**所屬教程*/ private Tutorial tutorial; //setters and getters //toString} |
二、整合SpringBoot與ElasticSearch
1、引入相應的依賴
pom.xml
|
1
2
3
4
5
6
7
8
9
10
11
12
13
14
15
16
17
18
19
20
21
22
|
<parent> <groupId> org.springframework.boot </groupId> <artifactId> spring-boot-starter-parent </artifactId> <version> 1.3.0.RELEASE </version> </parent> <dependencies> <!-- 添加 web 應用的依賴 --> <dependency> <groupId> org.springframework.boot </groupId> <artifactId> spring-boot-starter-web </artifactId> </dependency> <!-- 添加 spring-data-elasticsearch的依賴 --> <dependency> <groupId> org.springframework.boot </groupId> <artifactId> spring-boot-starter-data-elasticsearch </artifactId> </dependency> <dependency> <groupId> org.springframework.boot</groupId> <artifactId> spring-boot-starter-test </artifactId> </dependency> </dependencies> |
2、修改配置文件
application.yml
|
1
2
3
4
5
6
7
8
9
|
spring: data: elasticsearch: cluster-name: #默認為elasticsearch cluster-nodes: #配置es節點信息,逗號分隔,如果沒有指定,則啟動ClientNode properties: path: logs: ./elasticsearch/log #elasticsearch日志存儲目錄 data: ./elasticsearch/data #elasticsearch數據存儲目錄 |
這些配置的屬性,最終會設置到ElasticsearchProperties這個實體中。
3、為實體添加ElascticSearch的注解
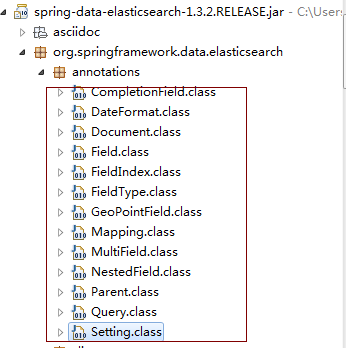
Spring-data-elasticSearch提供了一些注解來幫助我們快速針對實體建立索引。

因為我們希望Article作為我們文章的搜索入口,所以我們在Article類上添加@Document注解。
|
1
2
3
4
|
@Document(indexName="projectname",type="article",indexStoreType="fs",shards=5,replicas=1,refreshInterval="-1")public class Article implements Serializable{....} |
默認情況下,添加@Document注解會對實體中的所有屬性建立索引,由于本教程是講解如何整合,并不是專門講解ElasticSearch,故對于其他注解不再講解。
4、建立搜索類
我們只要編寫一個接口ArticleSearchRepository,來繼承Spring-data-elasticSearch提供的ElasticsearchRepository即可。
|
1
2
3
4
5
6
7
|
import org.springframework.data.elasticsearch.repository.ElasticsearchRepository; import com.tianshouzhi.springbootstudy.domain.Article;//泛型的參數分別是實體類型和主鍵類型public interface ArticleSearchRepository extends ElasticsearchRepository<Article, Long>{ } |
5、單元測試
5.1、創建索引
|
1
2
3
4
5
6
7
8
9
10
11
12
13
14
15
16
17
18
19
20
21
22
23
24
25
26
27
28
29
30
31
32
33
|
@RunWith(SpringJUnit4ClassRunner.class)@SpringApplicationConfiguration(classes = Application.class)public class ElasticSearchTest { @Autowired private ArticleSearchRepository articleSearchRepository; @Test public void testSaveArticleIndex(){ Author author=new Author(); author.setId(1L); author.setName("tianshouzhi"); author.setRemark("java developer"); Tutorial tutorial=new Tutorial(); tutorial.setId(1L); tutorial.setName("elastic search"); Article article =new Article(); article.setId(1L); article.setTitle("springboot integreate elasticsearch"); article.setAbstracts("springboot integreate elasticsearch is very easy"); article.setTutorial(tutorial); article.setAuthor(author); article.setContent("elasticsearch based on lucene," + "spring-data-elastichsearch based on elaticsearch" + ",this tutorial tell you how to integrete springboot with spring-data-elasticsearch"); article.setPostTime(new Date()); article.setClickCount(1L); articleSearchRepository.save(article); } } |
運行單元測試,項目根目錄下出現:

說明我們索引已經創建成功。
5.2測試搜索:
|
1
2
3
4
5
6
7
8
9
10
|
@Test public void testSearch(){ String queryString="springboot";//搜索關鍵字 QueryStringQueryBuilder builder=new QueryStringQueryBuilder(queryString); Iterable<Article> searchResult = articleSearchRepository.search(builder); Iterator<Article> iterator = searchResult.iterator(); while(iterator.hasNext()){ System.out.println(iterator.next()); } } |
運行單元測試,控制臺輸出
- Article [id=1, title=springboot integreate elasticsearch, abstracts=springboot integreate elasticsearch is very easy, content=elasticsearch based on lucene,spring-data-elastichsearch based on elaticsearch,this tutorial tell you how to integrete springboot with spring-data-elasticsearch, postTime=Sun Feb 21 16:01:37 CST 2016, clickCount=1, author=Author [id=1, name=tianshouzhi, remark=java developer], tutorial=Tutorial [id=1, name=elastic search]]
說明搜索成功。讀者可以嘗試其他的搜索關鍵字進行搜索。
說明:以上方式是SpringBoot與ElasticSearch進行本地整合,即將ElasticSearch內嵌在應用,如果我們搭建了ElasticSearch集群,只需要將配置改為如下配置即可:
|
1
2
3
4
|
spring: data: elasticsearch: cluster-nodes:115.28.65.149:9300 #配置es節點信息,逗號分隔,如果沒有指定,則啟動ClientNode |
以上就是本文的全部內容,希望對大家的學習有所幫助,也希望大家多多支持服務器之家。
原文鏈接:http://www.tianshouzhi.com/api/tutorials/springboot/101


